2.1. Managing token in self service#
2.1.1. Conditions for use#
Policies allow users to take action
For details to define a selfservice policy read Selfservice policies and Users in policies.
Specific actions in the policies are necessary for the function of the tokens
For details to define a token specific action in selfservice policy read Selfservice policies and Introduction for concerned tokens.
2.1.2. Access SelfService Portal#
Open your web browser and go to the address that was given to you by your IT department. It should be something like: https://linotp.yourdomain.com/
Typically, a user is a user from a UserIdResolver with user@realm and their password. Their allowed actions are set up via policies.
Note
As long as no selfserivce policy is defined, users are not able to do anything in the SelfService Portal.
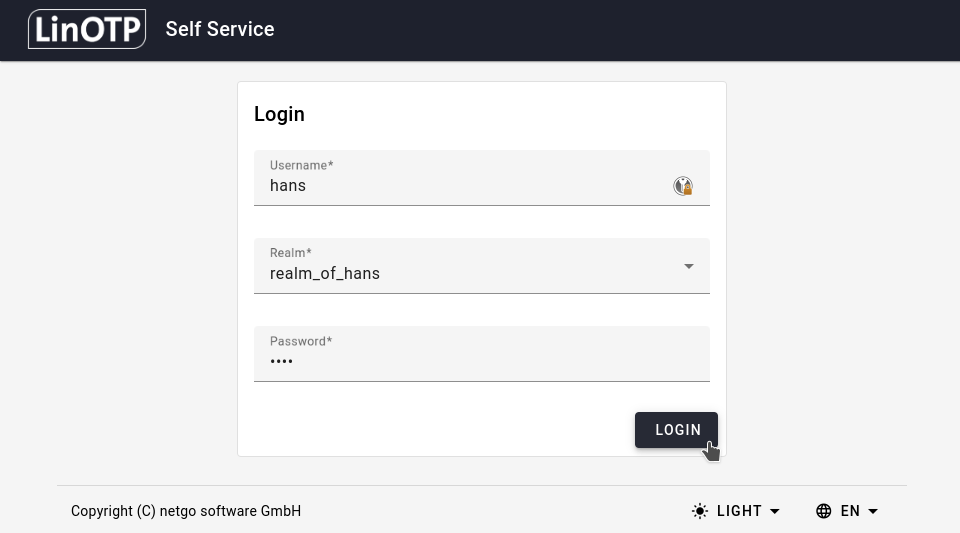
LinOTP SelfService Portal login screen.#
Here users can login using their credentials. These will probably be their domain credentials. For more details consult your IT department.
2.2. Typical usecases for supported token in self service#
2.2.1. Basic actions for tokens#
Extract from the complete list in Selfservice policies
General features for all tokens
actions: verify - assign - unassign - enable - disable - delete - reset - resync - history
Activities related to the enrollment of tokens
actions: enroll<TYPE> - activate_<TYPE>
The LinOTP Push and QR Token as well as the OCRA2 tokens require a two-level enrollment with the enroll<TYPE> and activate_<TYPE> actions.
Other token types come only with the enroll<TYPE> action.
If users are not allowed to enroll their own tokens, tokens usually get enrolled via admin API, are imported and then assigned, or automatically enrolled with autoenroll.
actions: edit_email - edit_sms
These actions allow the user to customize the email address or phone number during token enrollment. If not enabled, the user id resolver info is used and the user has no option to change the target.
action: verify
If the general feature verify is enabled, the user is compelled to verify their newly enrolled token also during the enrollment process.
Actions that are related to other LinOTP configuration.
action: setOTPPIN
This action should be enabled depending on the authentication policy action otppin. If otppin=password / otppin=1 is used, the user needs to provide their user password during authentication, nothing needs to be enabled in selfservice. If otppin=tokenpin / otppin=0 (default) is used, action setOTPPIN should be enabled to allow users to set a pin during enrollment and as a separate token action.
2.2.2. Application Scenario with the LinOTP Push Token#
The following preparations are necessary to use the LinOTP Push Token:
Customize the LinOTP configuration#
Setup scenario for LinOTP Push Token:
Set up a challenge-service for Push Provider for LinOTP Push Token
Define policy for the push token LinOTP Push Token Policies
Define policy for the self service Selfservice policies
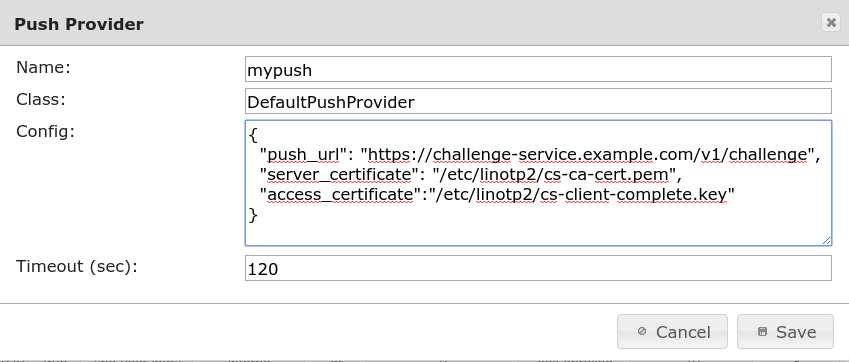
As a result, we get a push provider
Use ‘push.keyidetity.com’ in your setup as ‘push_url’, you also need the certificates from there. Inquiries can be directed to mailto:support@linotp.de.
Apache Certificate
The use of the LinOTP QR and PushToken requires an SSL certificate for the Apache, which is certified by a public certification authority, or created by a CA that is verifiable. For the successful authentication of users on a Windows or MacOS client via the user’s smartphone, a complete and certified certificate chain is necessary.
The policy required for this purpose is as follows
Exported policy.cfg
[Selfservice_Push]
scope = selfservice
action = "enrollPUSH, activate_PushToken, delete"
realm = *
user = *
client = *
time = "* * * * * *;"
active = True
[push_callbacks]
scope = authentication
action = pushtoken_pairing_callback_url=https://challenge-service.example.com/
user = *
realm = *
client = *
time = "* * * * * *;"
active = True
[push_callbacks_challenge]
scope = authentication
action = pushtoken_challenge_callback_url=https://challenge-service.example.com/
user = *
realm = *
client = *
time = "* * * * * *;"
active = True
Testing the configuration with a Push Token#
Login to SelfService https://<LinOTP>
Enroll a push token
Activate this push token
Verifying authentication https://<LinOTP>/auth/pushtoken
See also this section: Testing of the LinOTP Push Token
Prepare Windows or Apple Clients with LinOTP Authentication Provider LAP#
- Configure LAP (LinOTP Authentication Provider) to use the push token
The LAP affords 2FA for the Windows or Apple Desktop
The LinOTP server desired for the authentication of the 2FA is to be configured. For this, the LinOTP Server certificate is installed. The corresponding documentation comes with the product
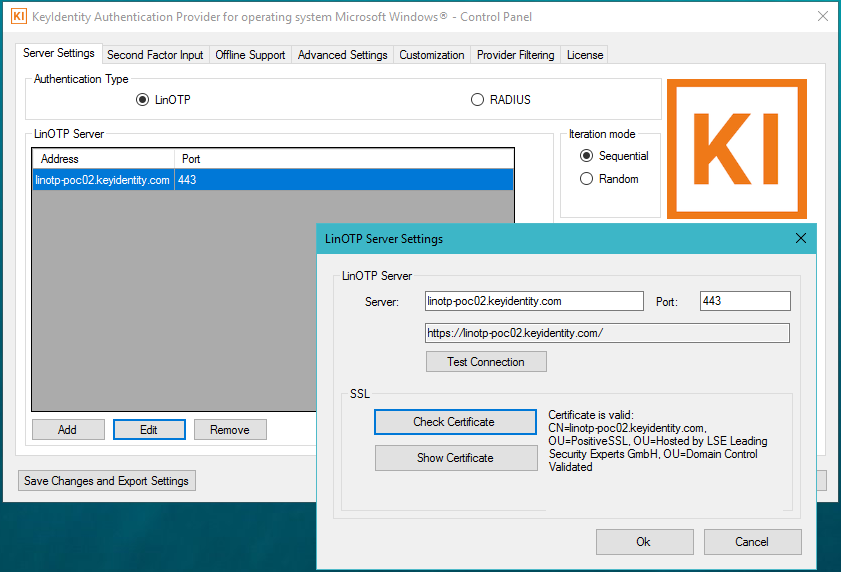
Detailed documentation on the LinOTP Authentication Provider is provided with the LAP license.
Install the LinOTP Authenticator app on the users smartphone#
LinOTP Authenticator can be installed via Google Play Store on Android or the App Store on iOS.
Rollout and activate the push token by the user#
With policies enrollPUSH and activate_PushToken a push token can be enrolled by users in the SelfService Portal.
Make sure your mobile phone has the LinOTP Authenticator app installed. Open LinOTP Authenticator before you start.
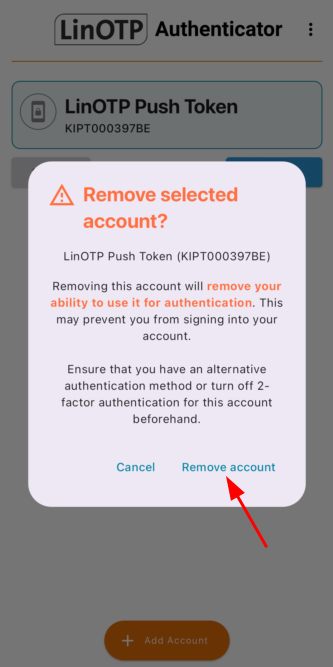
If your LinOTP Authenticator is already configured with a token, which is no longer required, delete it by e.g. long-pressing that token and clicking on delete:
To use the push token, the mobile phone must be online, best suited for this is wifi. Details are described in the user documentation also supplied with the LAP.
Rolling out a push token requires two steps:
Step 1: Enroll a push token in the SelfService Portal and scan the qr-code with the LinOTP Authenticator app.
Step 2: Activate this push token by confirming its use with the LinOTP Authenticator app.
Step 1: Enroll your Push Token#
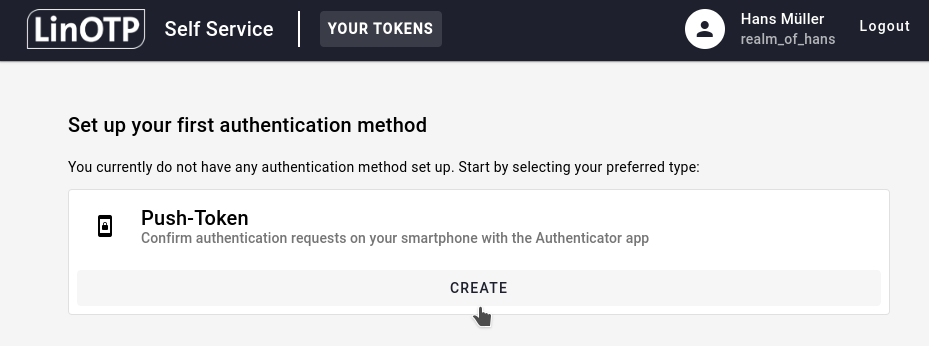
To initialize a new push token, login to the SelfService Portal, and under Set up a new authentication method (or Set up your first authentication method, If you haven’t enrolled any tokens yet) search for Push-Token and click on CREATE:
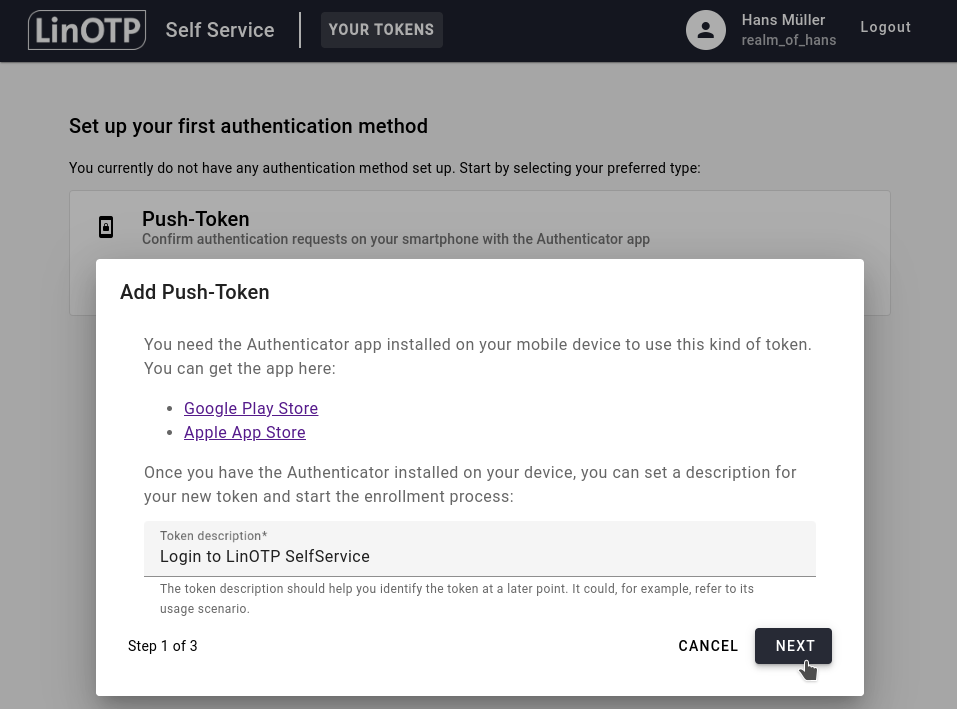
You can then add a suitable description for your token. It could e.g. describe its usage scenario like “Login to LiNOTP SelfService”. Confirm by clicking NEXT:
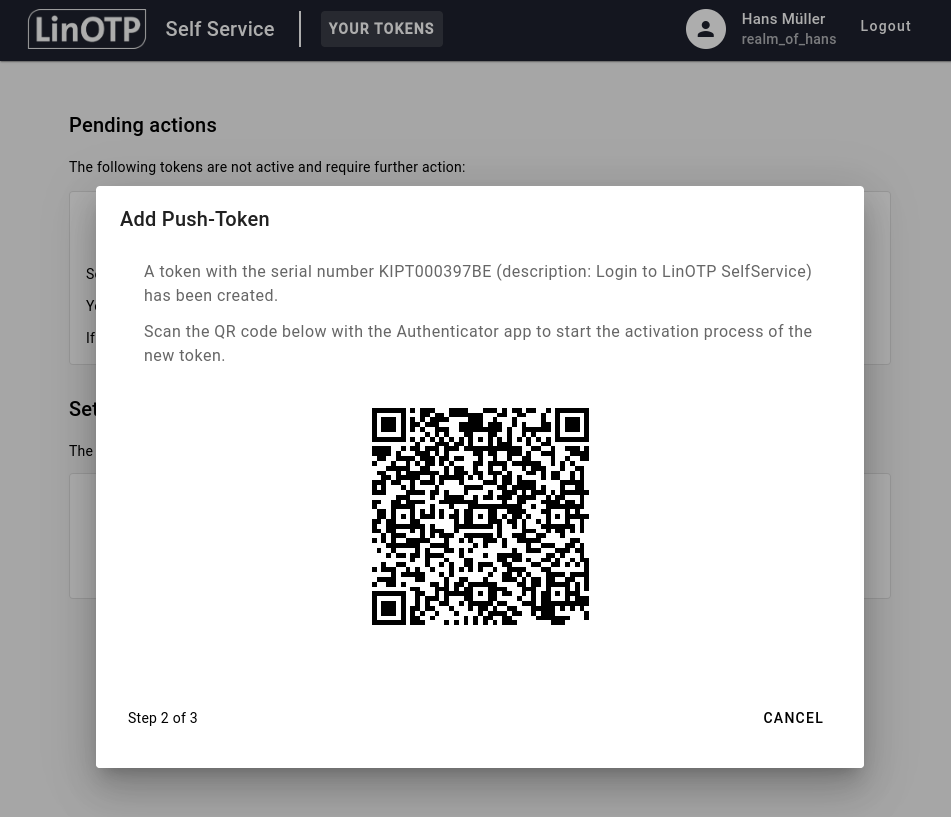
A QR-Code will be displayed:
Take your smartphone, open the LinOTP Authenticator, click on Add account and scan the QR-Code with your LinOTP Authenticator:
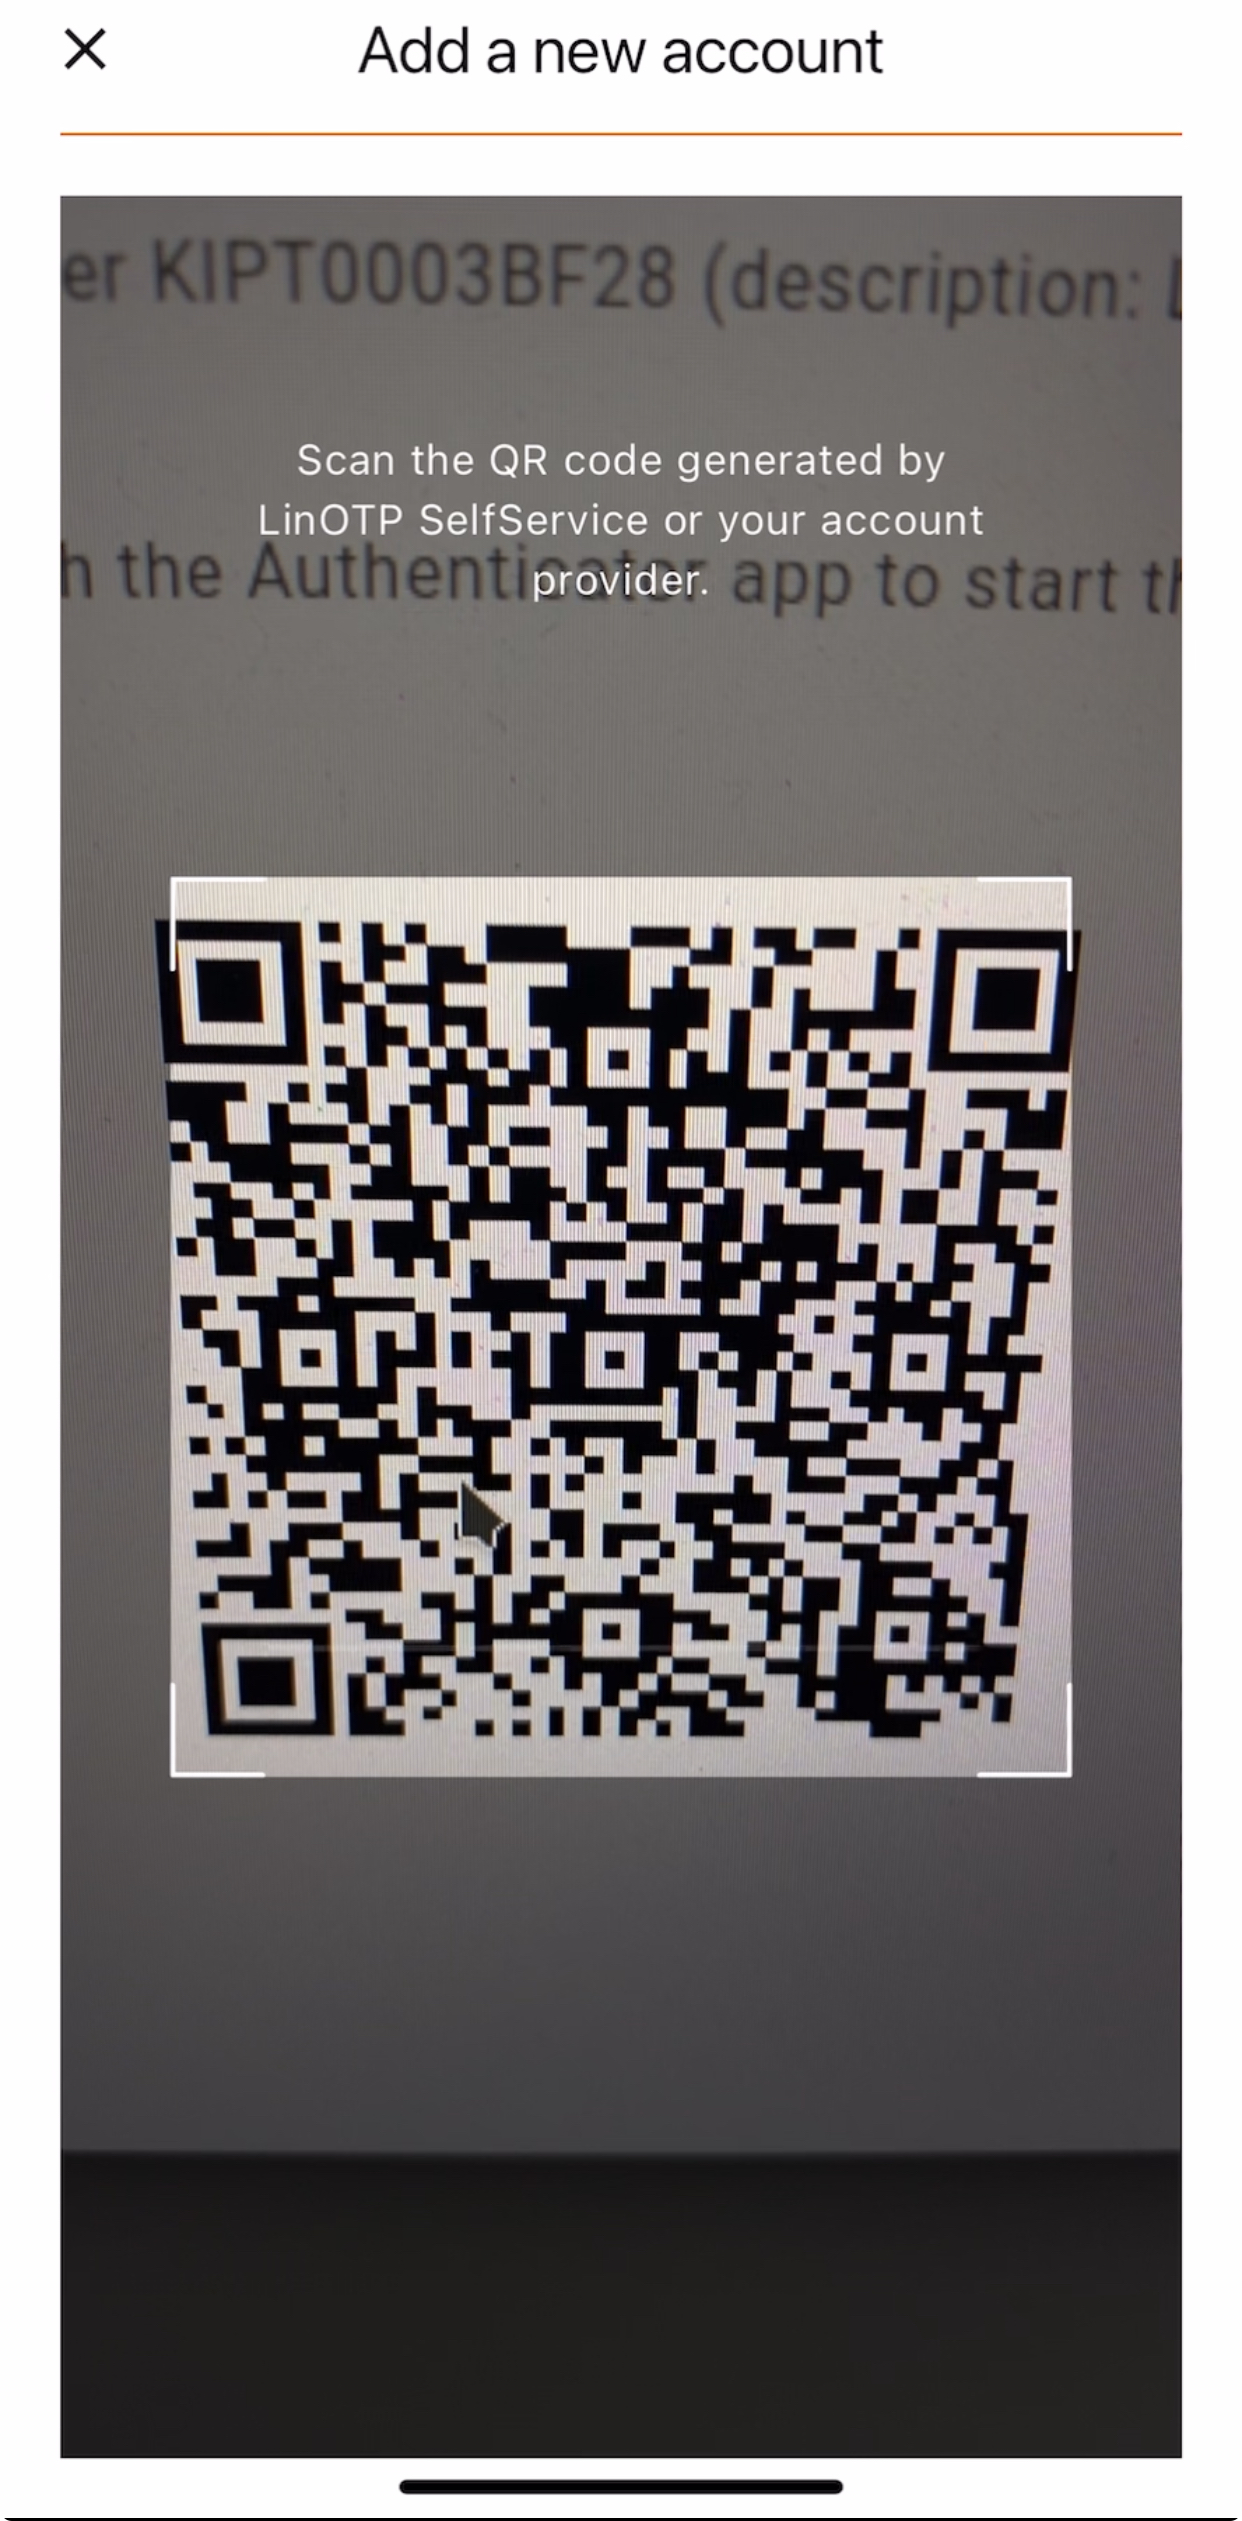
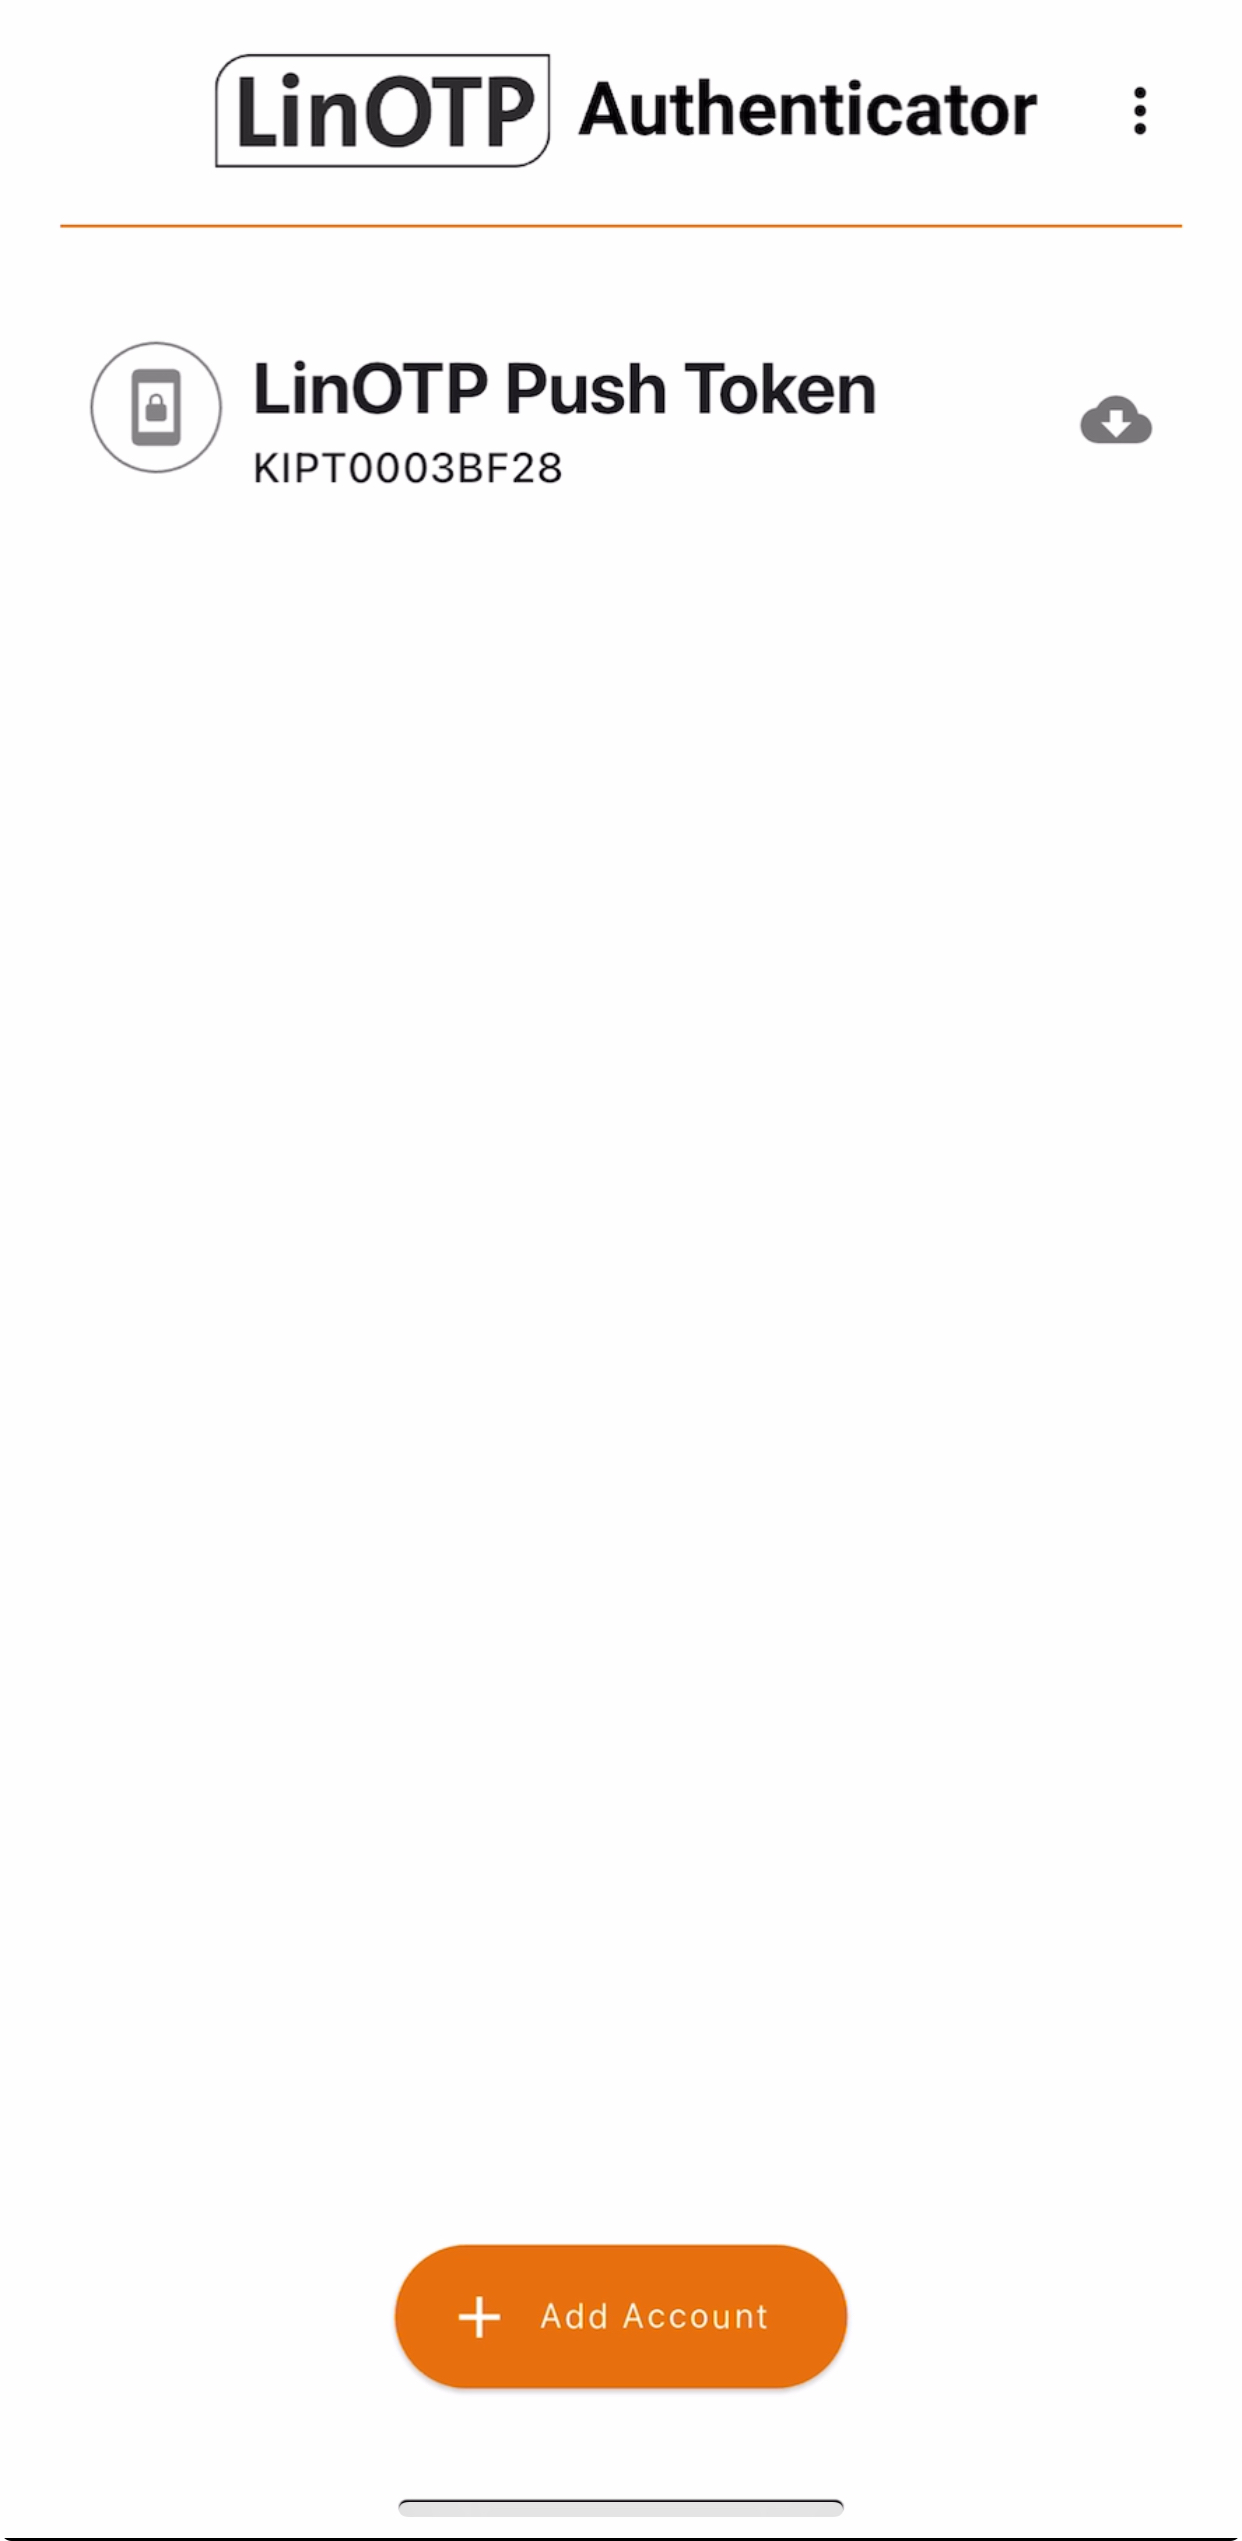
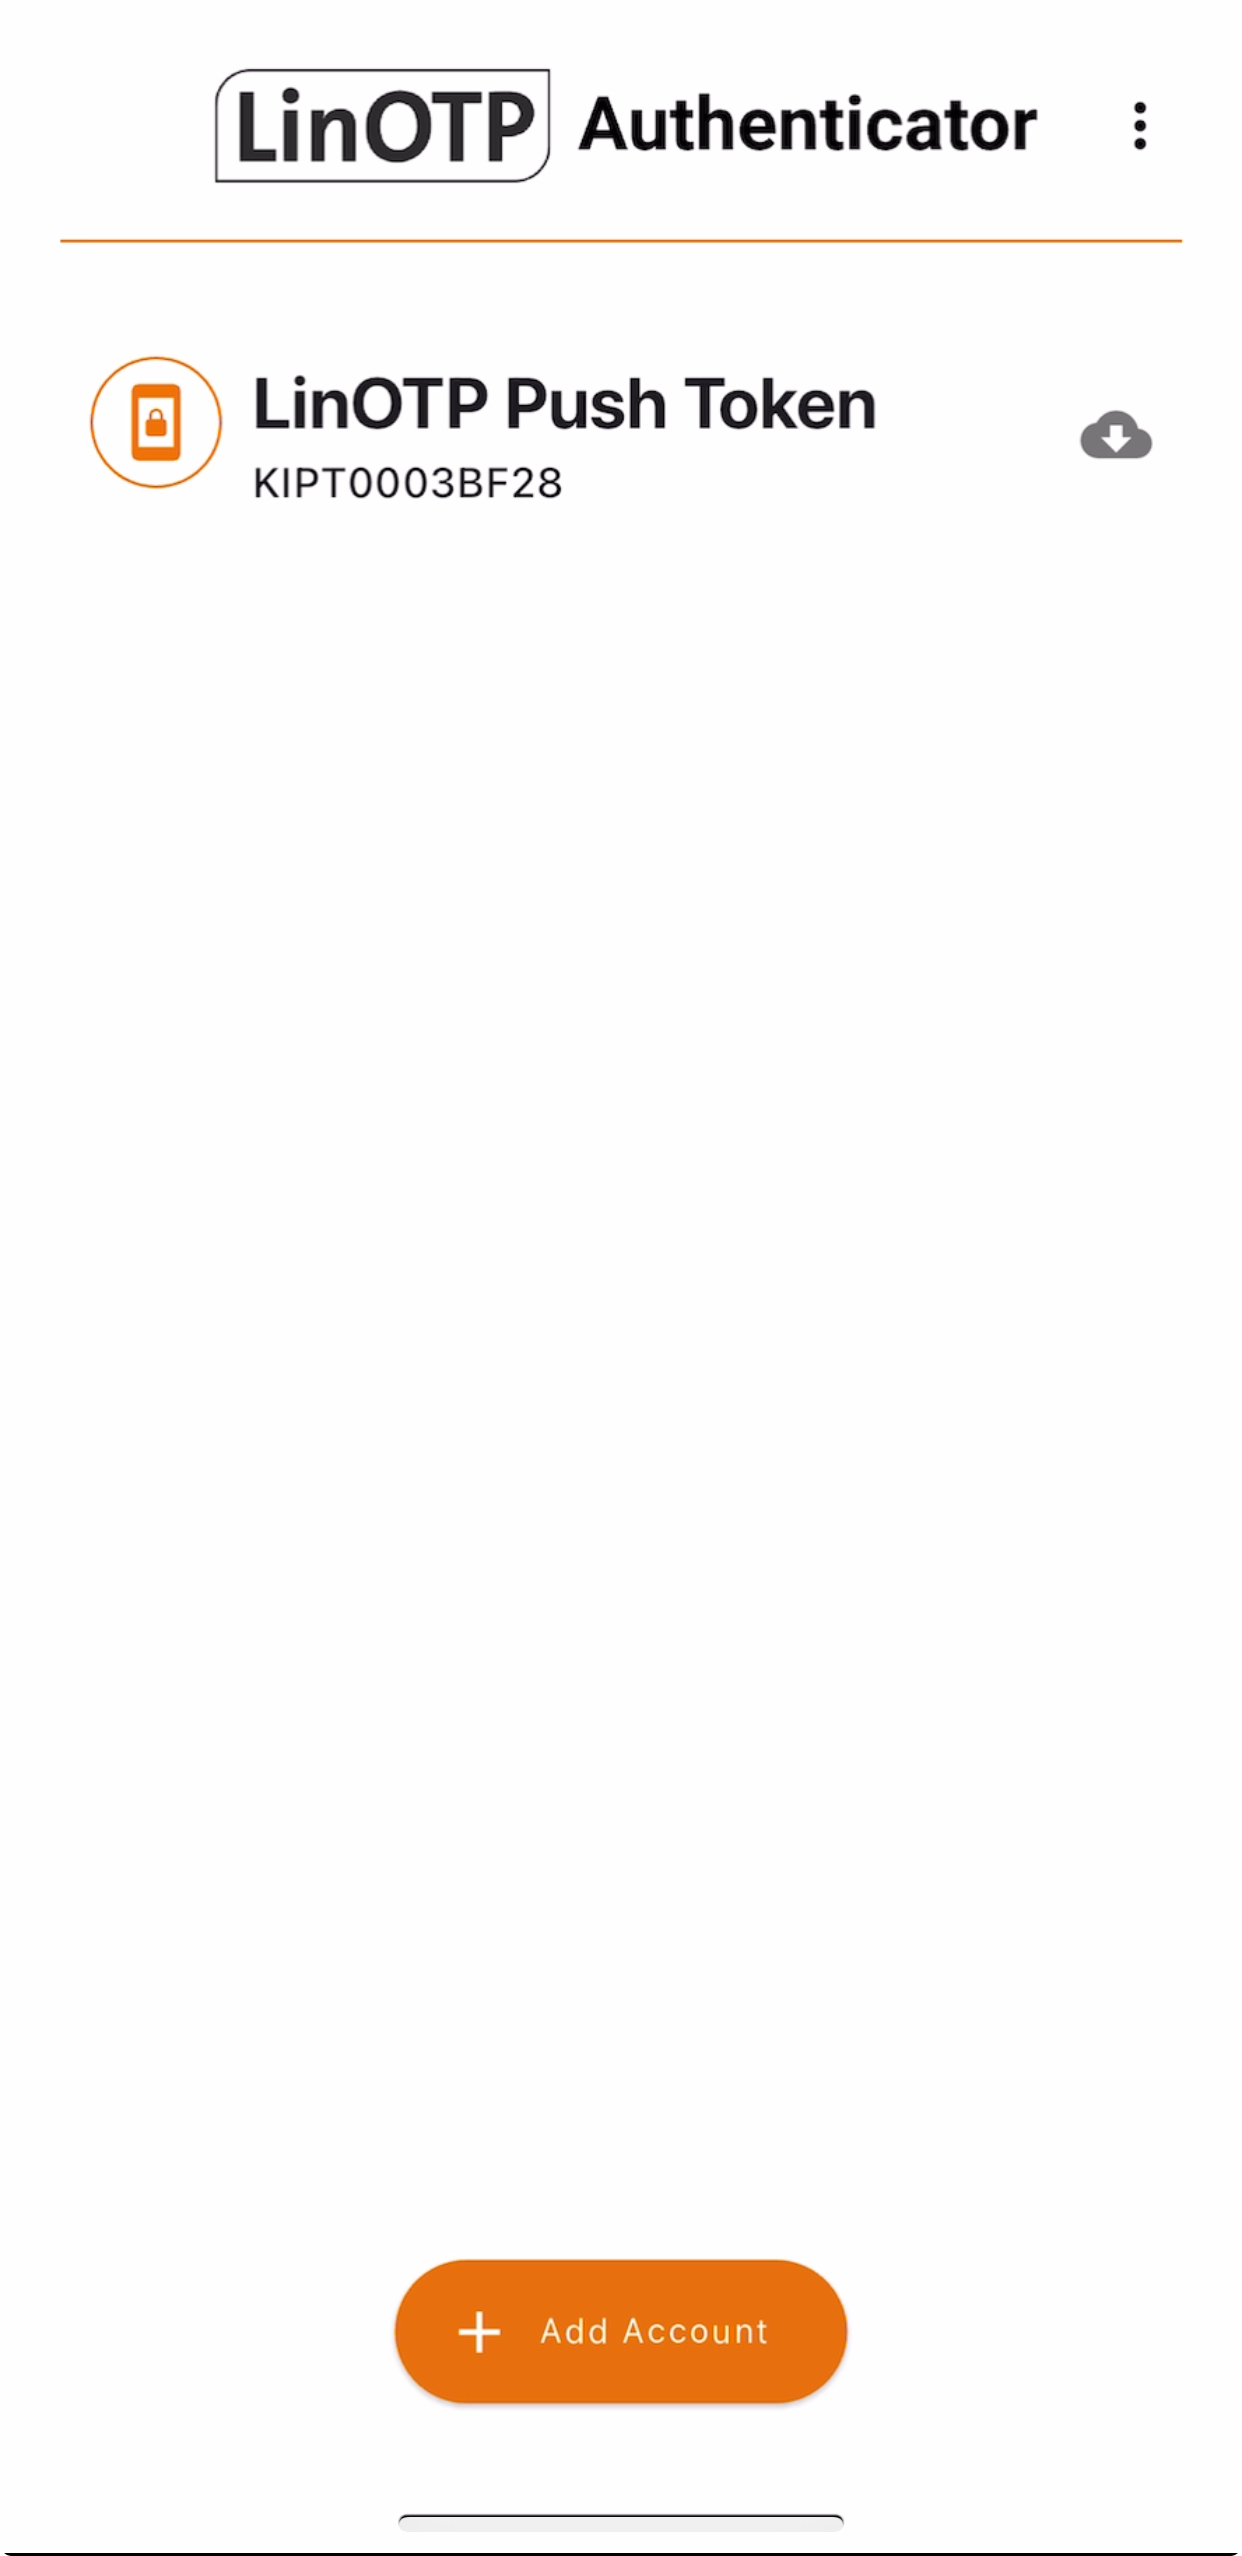
After the successful scan, you will see your push token in your LinOTP Authenticator. Its icon is currently grayed out, because it’s deactivated. We will activate it in step 2.
Step 2 Activate your Push Token#
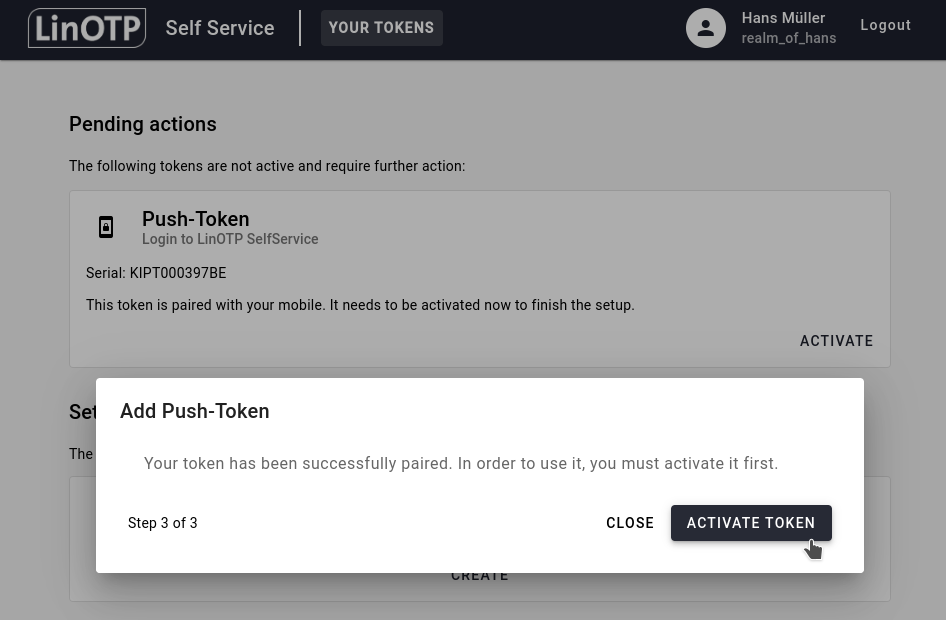
Head over to the SelfService Portal and you will see the following activation step. Click on ACTIVATE TOKEN to start the activation process of your push token.
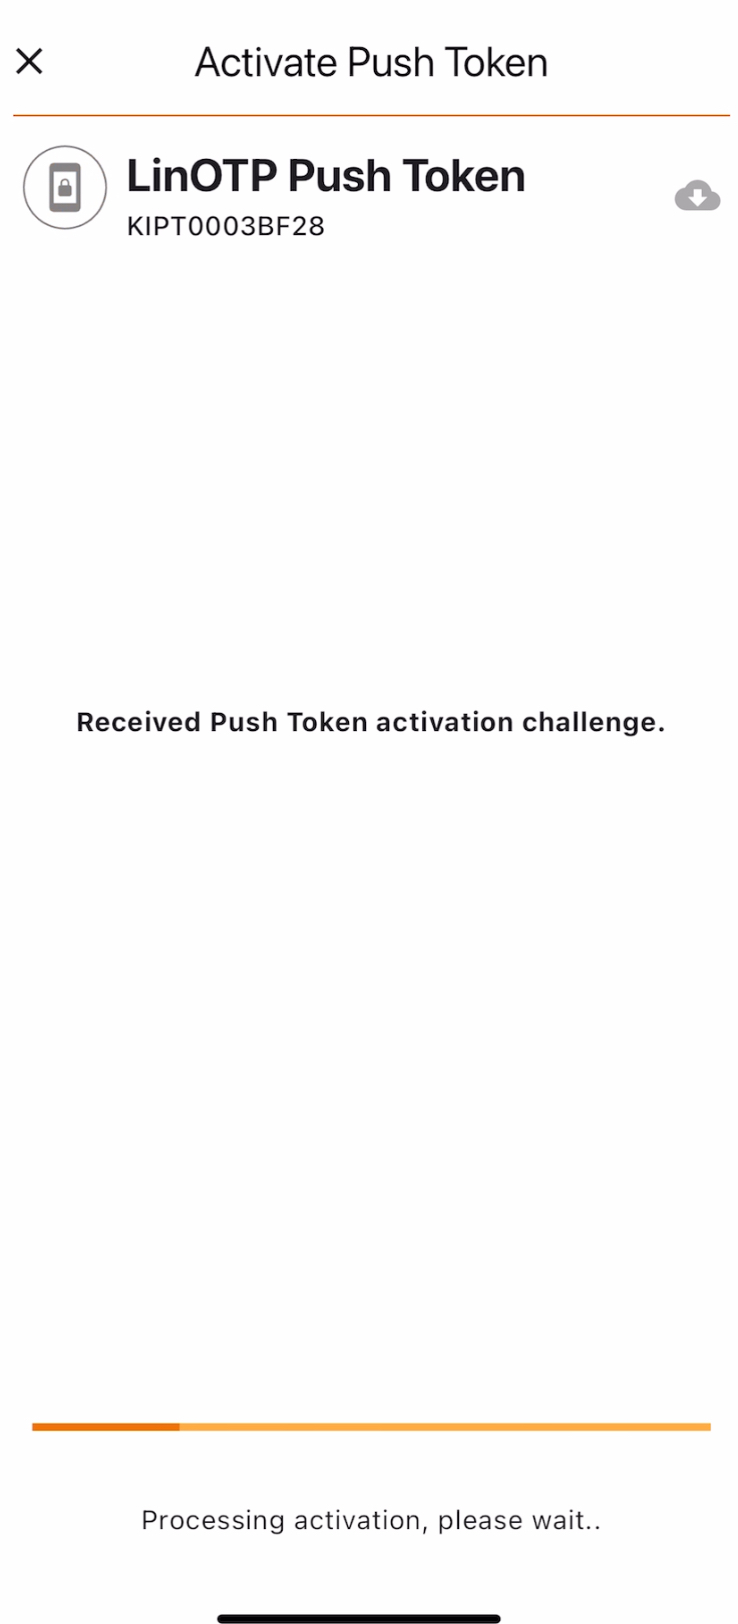
Now take your smartphone. If you haven’t already opened the LinOTP Authenticator, you should have received a notification. Click on it to start the activation process. If you already had the LinOTP Authenticator open, the process will have started automatically.
Depending on your internet connection, you might shortly see that the activation is starting:
After that the following screen is displayed stating that the Token activation is completed. Click on Done to return to the main view.
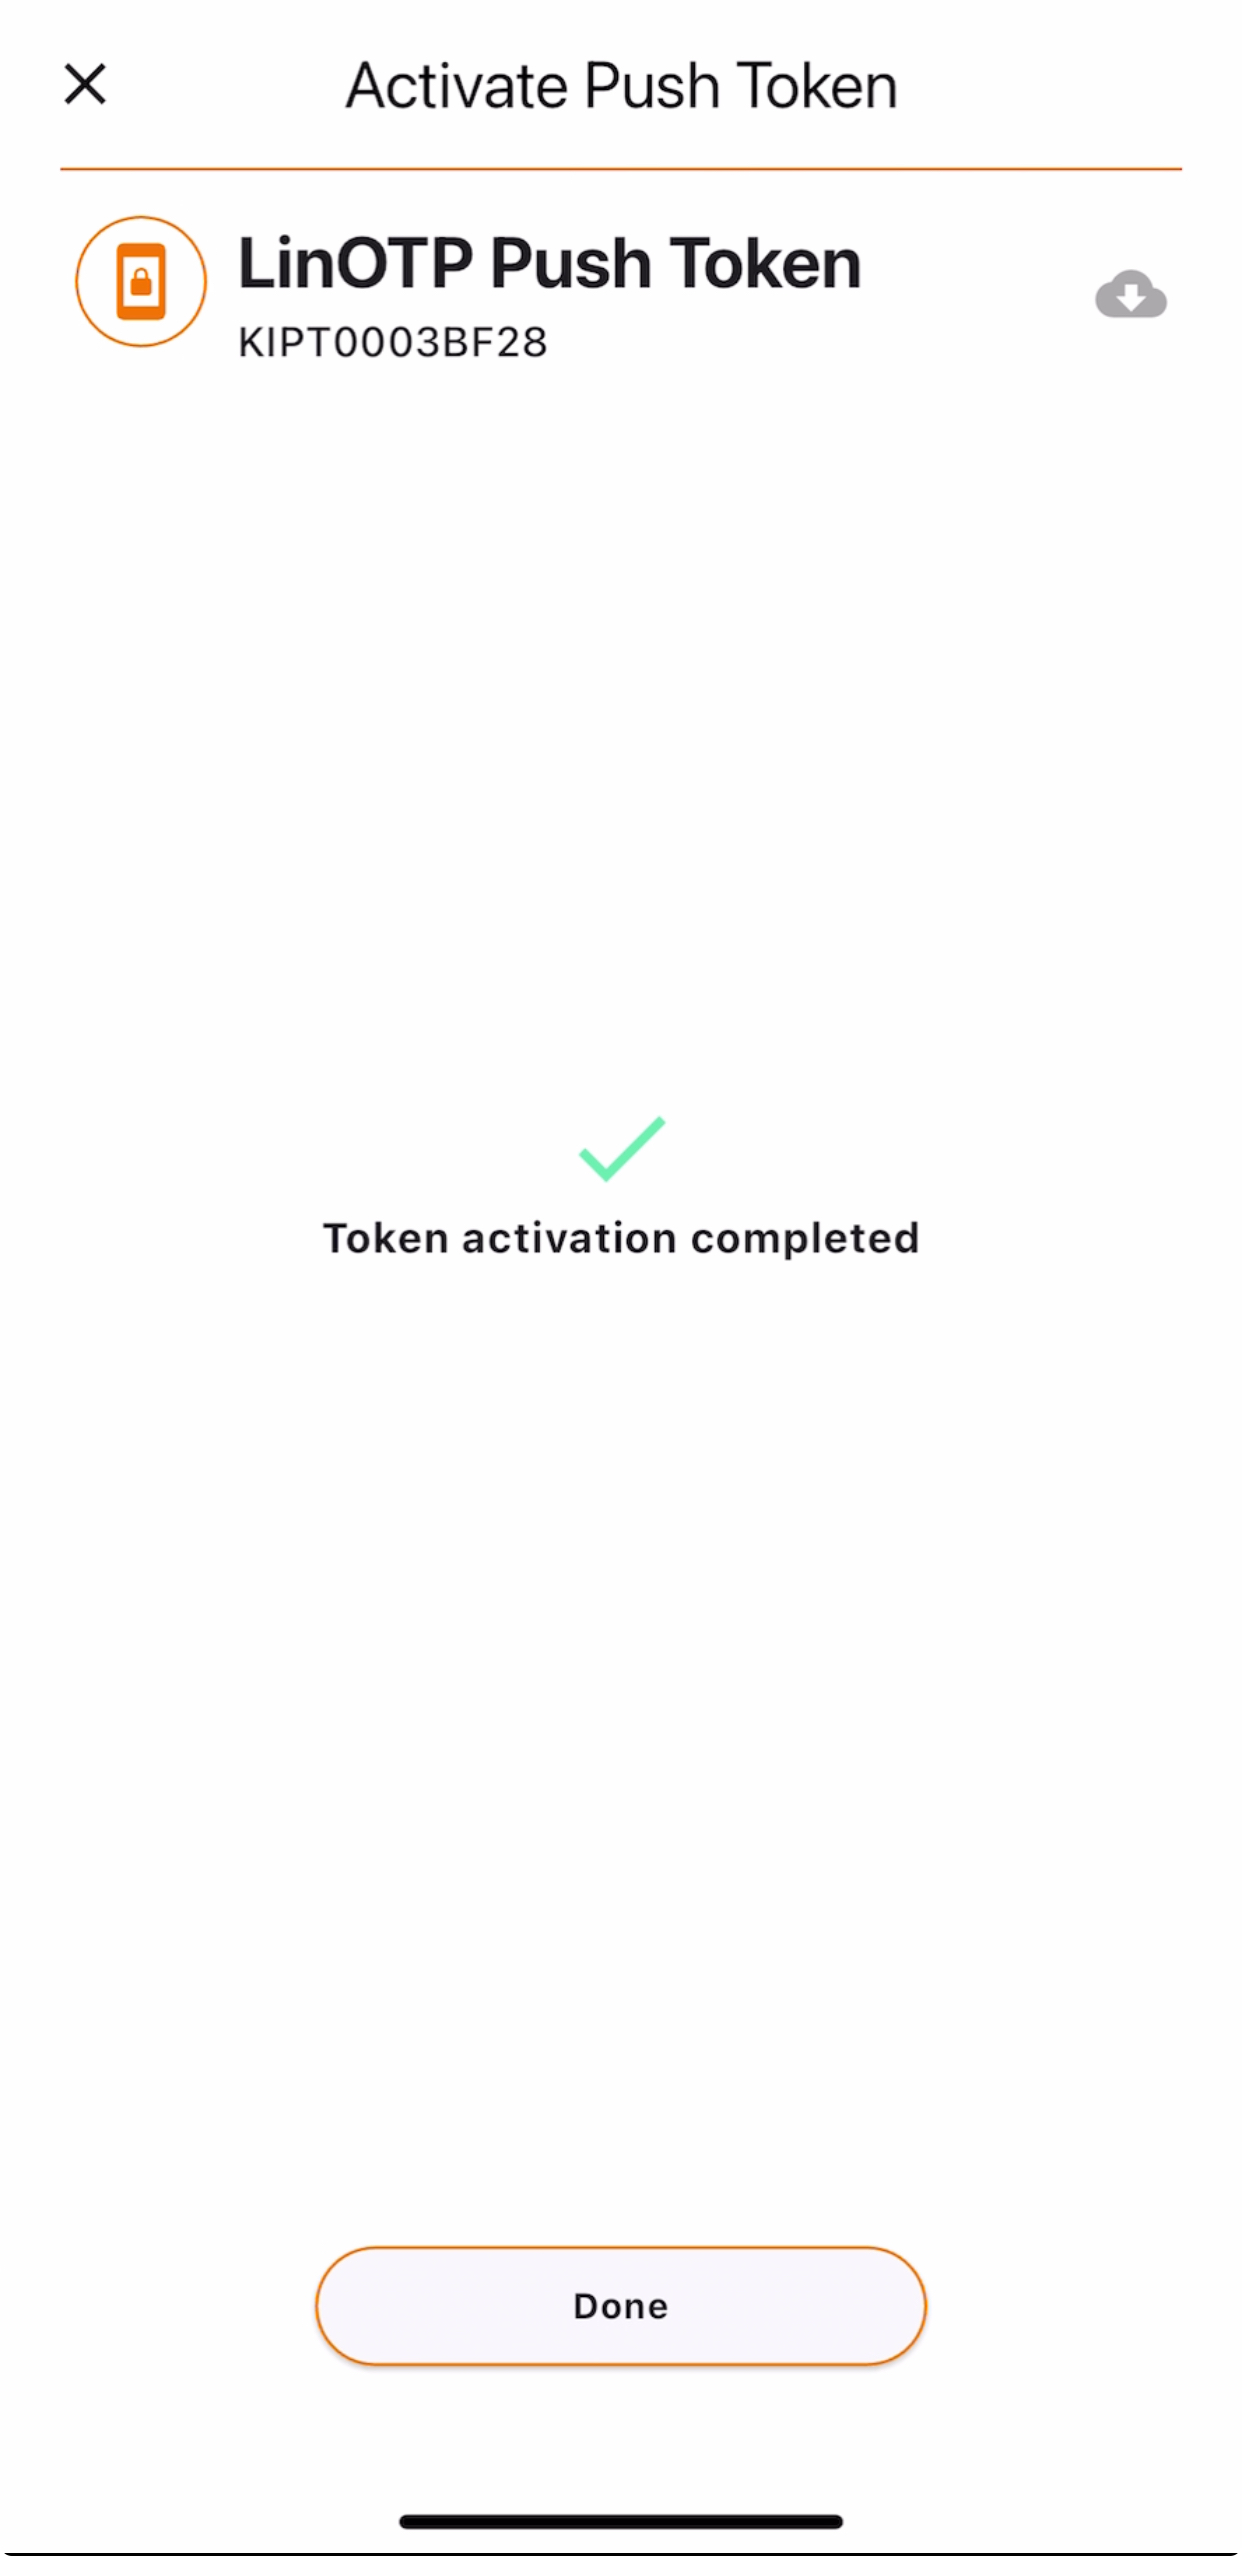
You will now see your activated push token with an orange icon. You’ve completed the activation and your push token is ready to use.
Test for LinOTP Push Token#
A push message can be triggered to test the function of an activated push token.
For details, please follow the link below: Testing of the LinOTP Push Token.
2.2.3. Application Scenario with the LinOTP QR Token#
The following preparations are necessary to use the LinOTP QR Token:
Customize the LinOTP configuration#
Announcing the Apache Certificate for the World. Issuing Certificate Authority,
Define policy for the qr token Setup LinOTP QR Token
Define policy for the self service Selfservice policies
Apache Certificate
The use of the LinOTP QR and PushToken requires an SSL certificate for the Apache, which is certified by a public certification authority, or created by a CA that is verifiable. For the successful authentication of users on a Windows or MacOS client via the user’s smartphone, a complete and certified certificate chain is necessary.
The policy required for this purpose is as follows
[Selfservice_QR]
scope = selfservice
action = "delete, enrollQR, activate_QRToken, "
user = *
realm = *
client = *
time = "* * * * * *;"
active = True
[qr_callbacks]
scope = authentication
action = qrtoken_pairing_callback_url=https://linotp-srv.my.domain/validate/pair
user = *
realm = *
client = *
time = "* * * * * *;"
active = True
[qr_callbacks_challenge]
scope = authentication
action = qrtoken_challenge_callback_url=https://linotp-srv.my.domain/validate/check_t
user = *
realm = *
client = *
time = "* * * * * *;"
active = True
[offline]
scope = authentication
action = support_offline=qr
user = *
realm = *
client = *
time = "* * * * * *;"
active = True
Prepare Windows or Apple Clients with LinOTP Authentication Provider LAP#
The same procedure as with the push or other token and a bit more for offline.
- Configure LAP (LinOTP Authentication Provider) to use the LinOTP QR token
The LAP affords 2FA for the Windows or Apple Desktop
The LinOTP server desired for the authentication of the 2FA is to be configured. For this, the LinOTP Server certificate is installed. The corresponding documentation comes with the product

To use the offline function, the permission must be given under ‘Offline Support’.
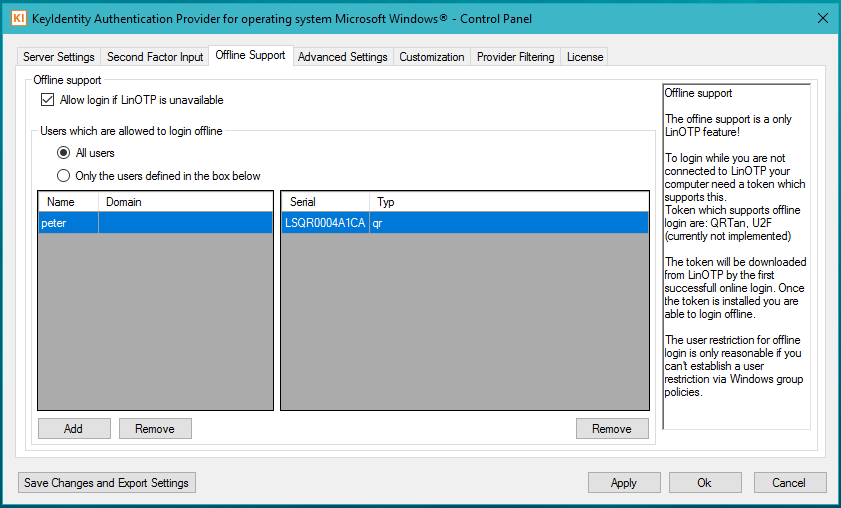
Detailed documentation on the LinOTP Authentication Provider is provided with the LAP license.
Install the LinOTP Authenticator app on the users smartphone#
LinOTP Authenticator can be installed via Google Play Store on Android or the App Store on iOS.
Rollout and activate the LinOTP QR token by the user#
With policies enrollQR and activate_QRToken a QR token can be enrolled by users in the SelfService Portal.
Make sure your mobile phone has the LinOTP Authenticator app installed. Open LinOTP Authenticator before you start.
If your LinOTP Authenticator is already configured with a token, which is no longer required, delete it by e.g. long-pressing that token and the clicking on delete:

To use with the qr token, the mobile phone must be online, best suited for this is wifi. Details are described in the user documentation also supplied with the LAP.
Rolling out a QR token requires two steps.
Step 1: Enroll a QR token in the SelfService Portal and scan the qr-code with the LinOTP Authenticator app.
Step 2: Activate this QR token by confirming its use with the LinOTP Authenticator app.
Step 1: Enroll your QR Token#
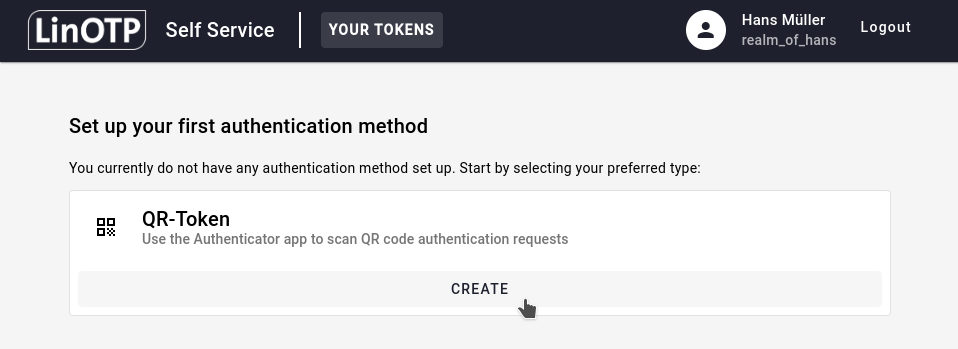
To initialize a new push token, login to the SelfService Portal, and under Set up a new authentication method (or Set up your first authentication method, If you haven’t enrolled any tokens yet) search for QR-Token and click on CREATE:
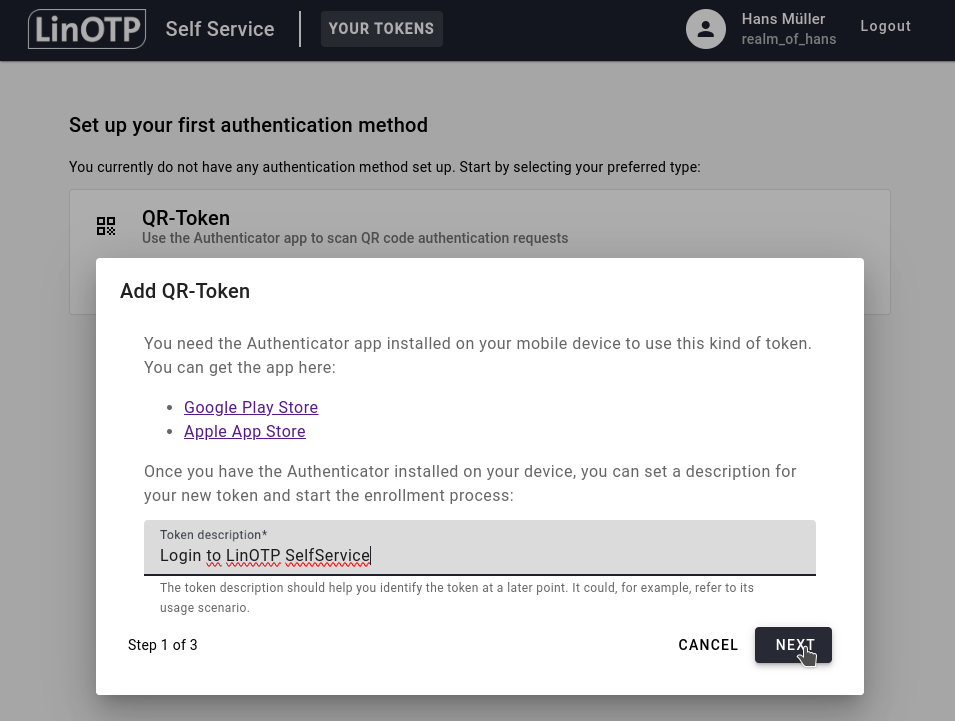
You can then add a suitable description for your token. It could e.g. describe its usage scenario like “Login to LiNOTP SelfService”. Confirm by clicking NEXT:
A QR-Code will be displayed:
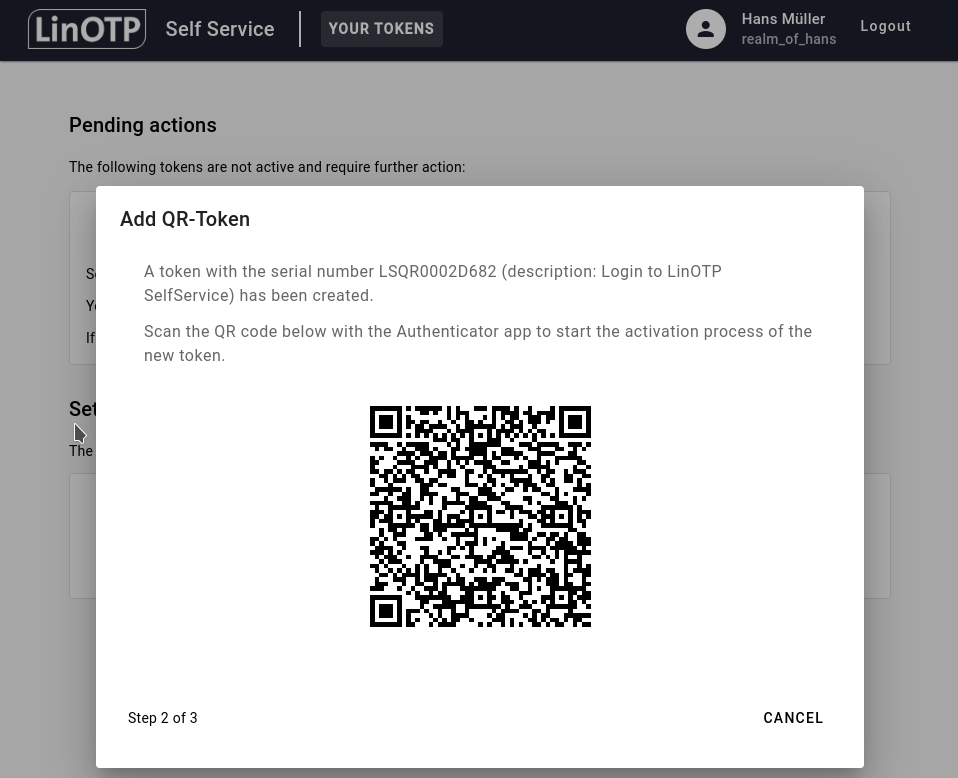
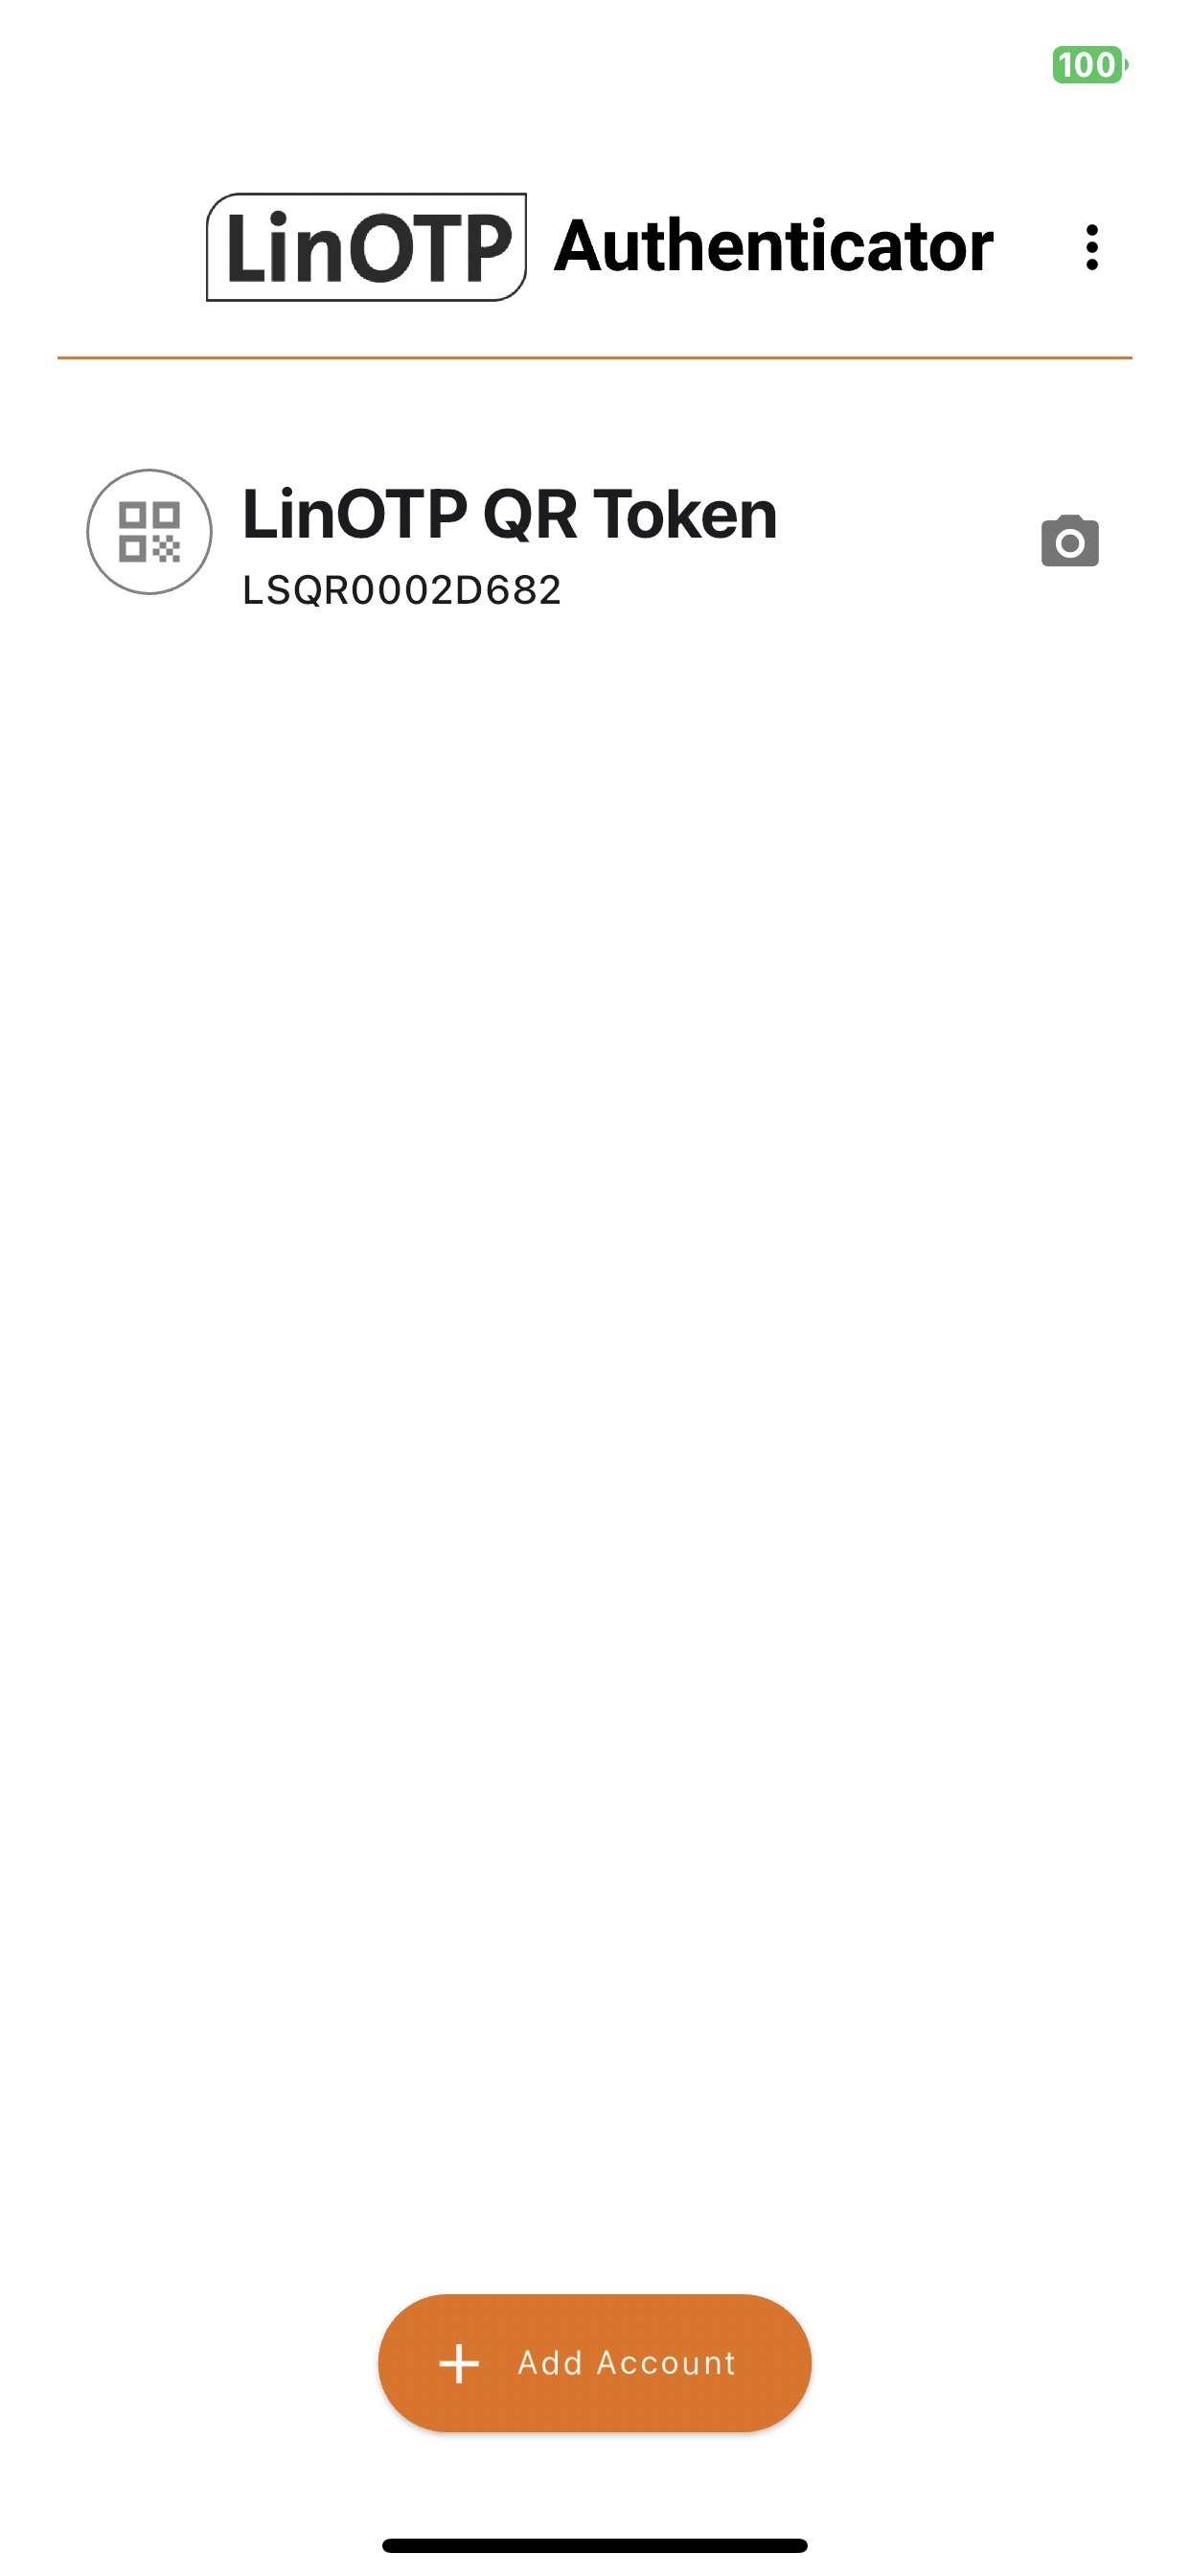
Take your smartphone, open the LinOTP Authenticator, click on Add account and scan the QR-Code with your LinOTP Authenticator:

After the successful scan, you will see your QR token in your LinOTP Authenticator. Its icon is currently grayed out, because it’s deactivated. We will activate it in step 2.
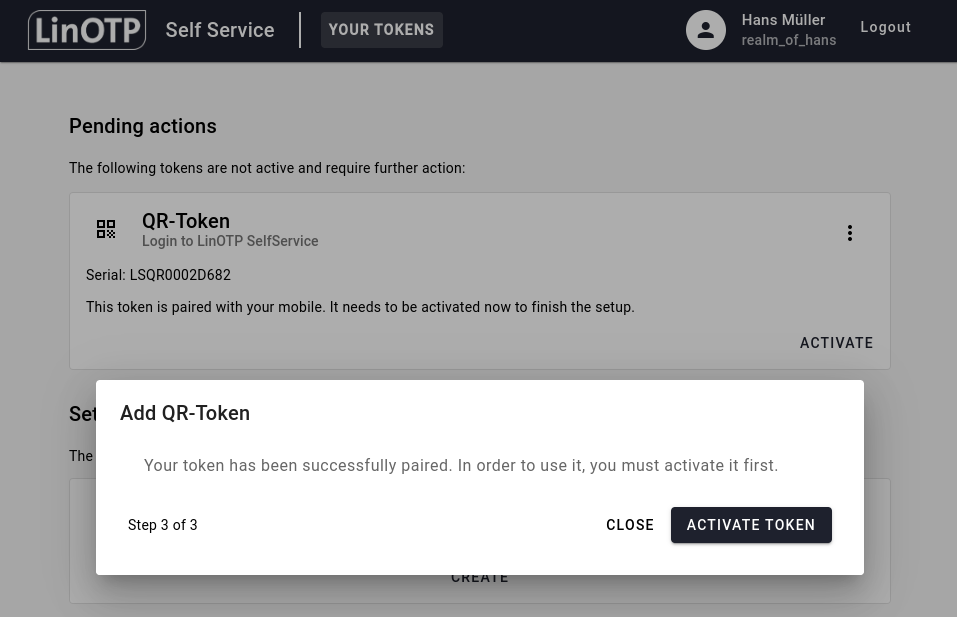
Step 2 Activate your QR Token#
Head over to the SelfService Portal and you will see the following activation step. Click on ACTIVATE TOKEN to start the activation process of your QR token.
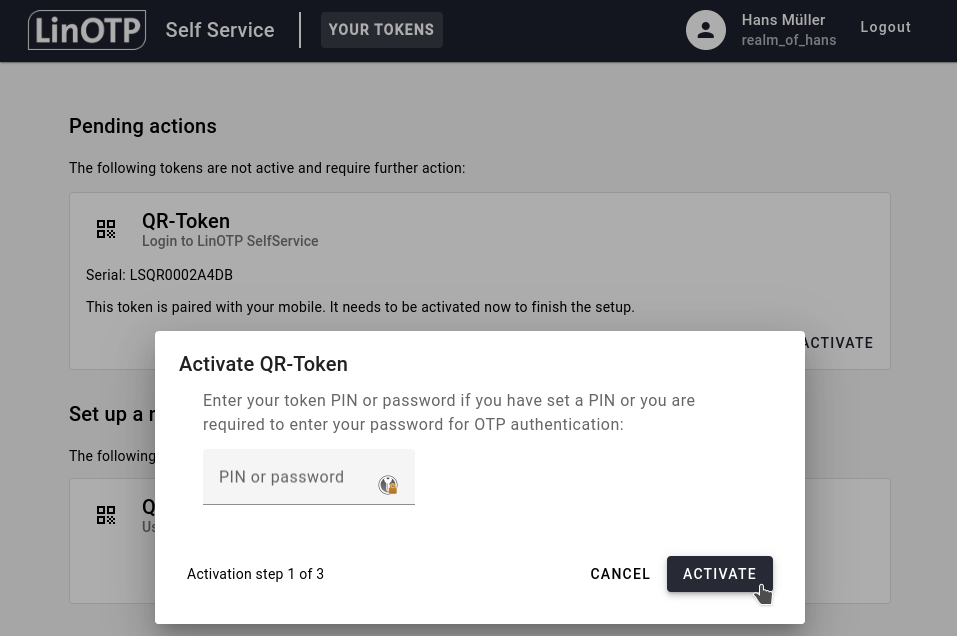
You will be asked to enter a PIN or password. If you haven’t set one or your admin hasn’t provided you with one, don’t worry, in this case you don’t need a PIN or password. Click on ACTIVATE to continue.
You will be shown another QR-Code. Head over to your smartphone, open LinOTP Authenticator, click on the QR Token you just rolled out and scan the displayed QR-Code.
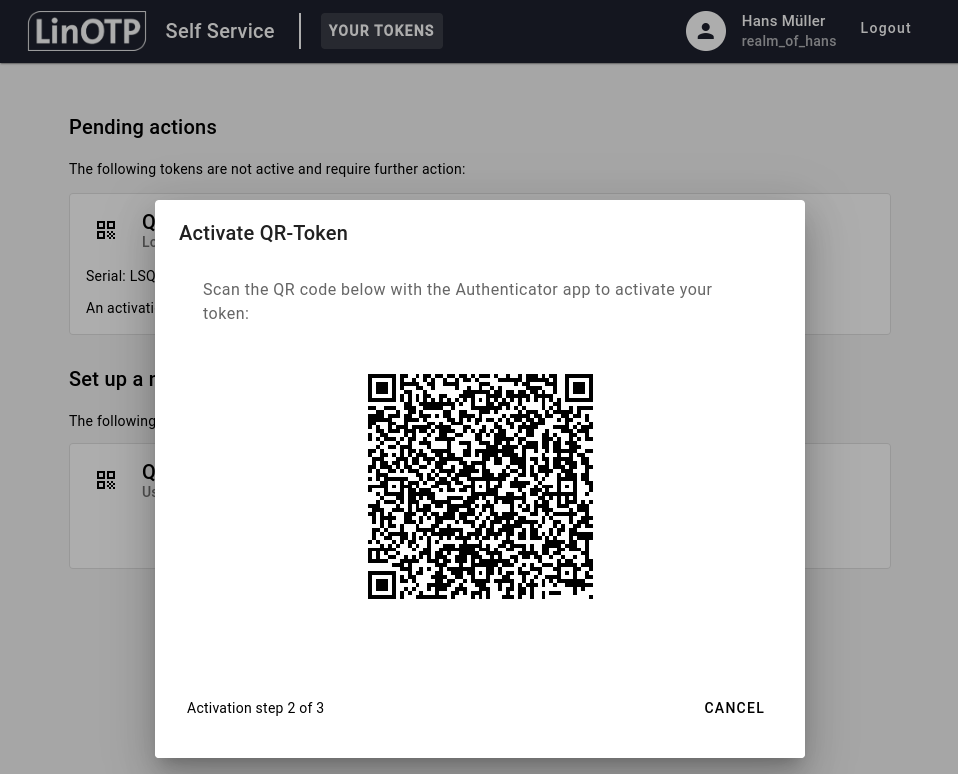
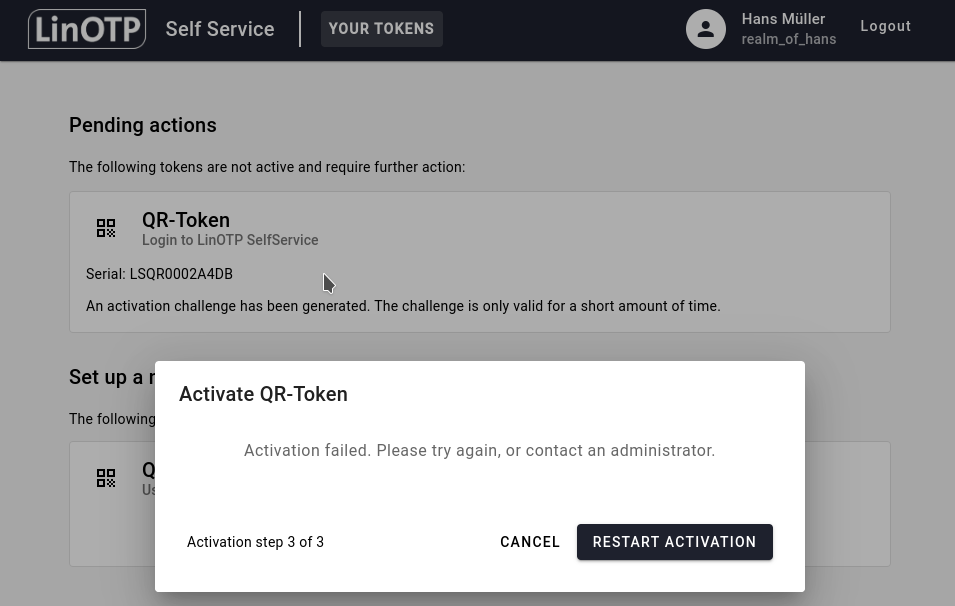
You might run into a timeout (the QR Code is valid for 10 seconds per default). In this case, simply click on RESTART ACTIVATION:
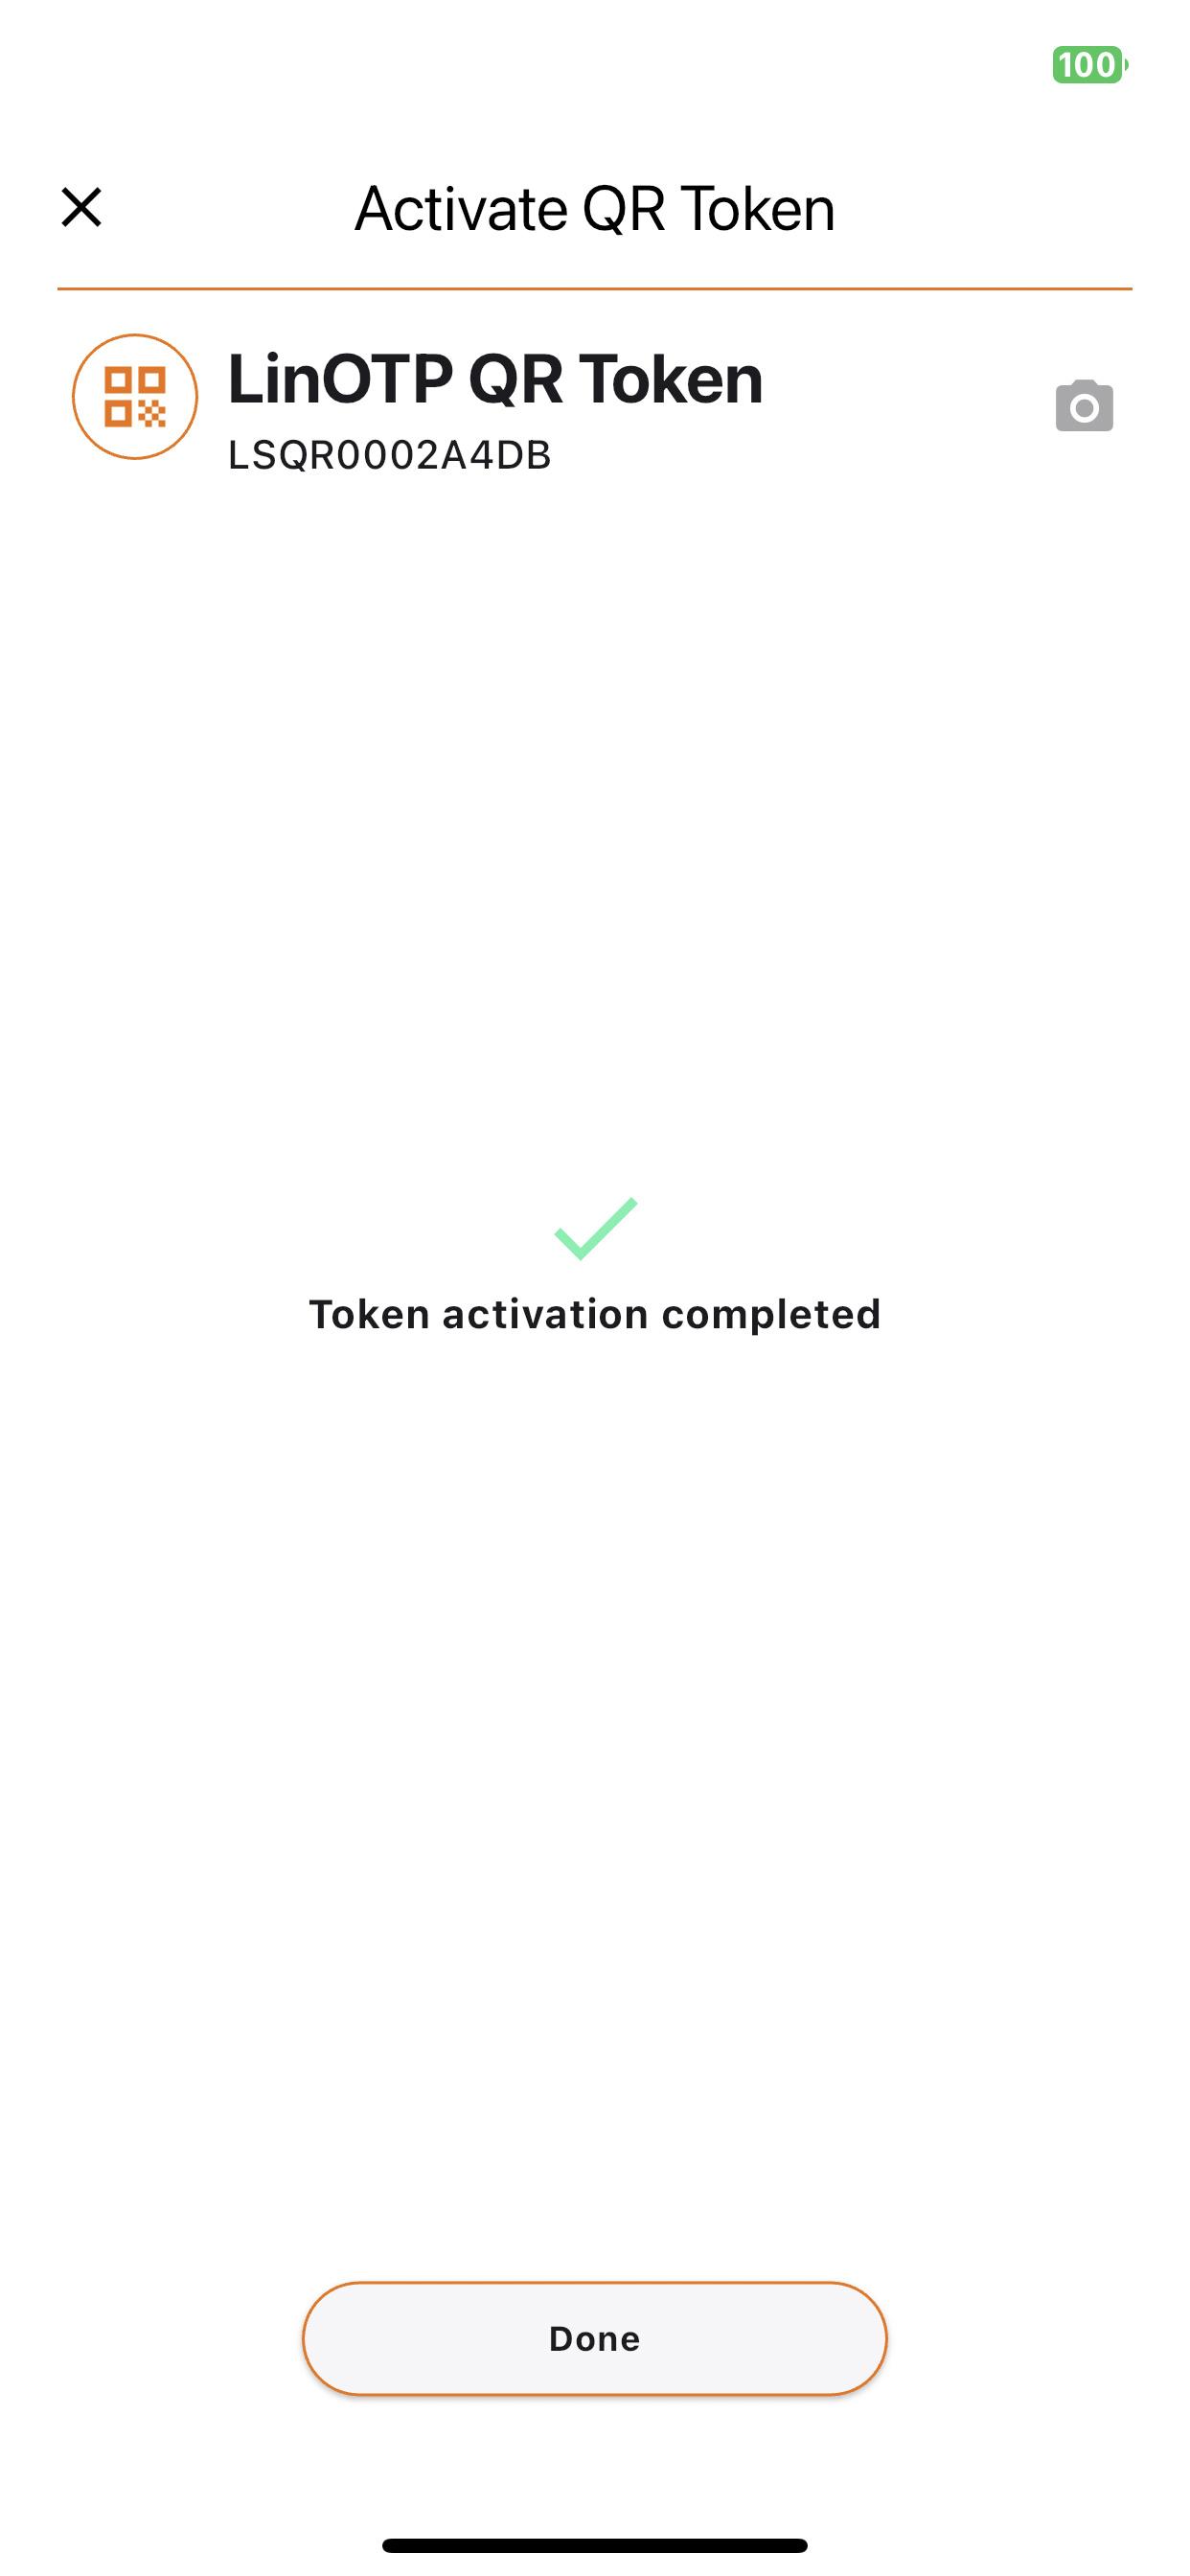
After the successful scan the following screen is displayed stating that the Token activation is completed. Click on Done to return to the main view.
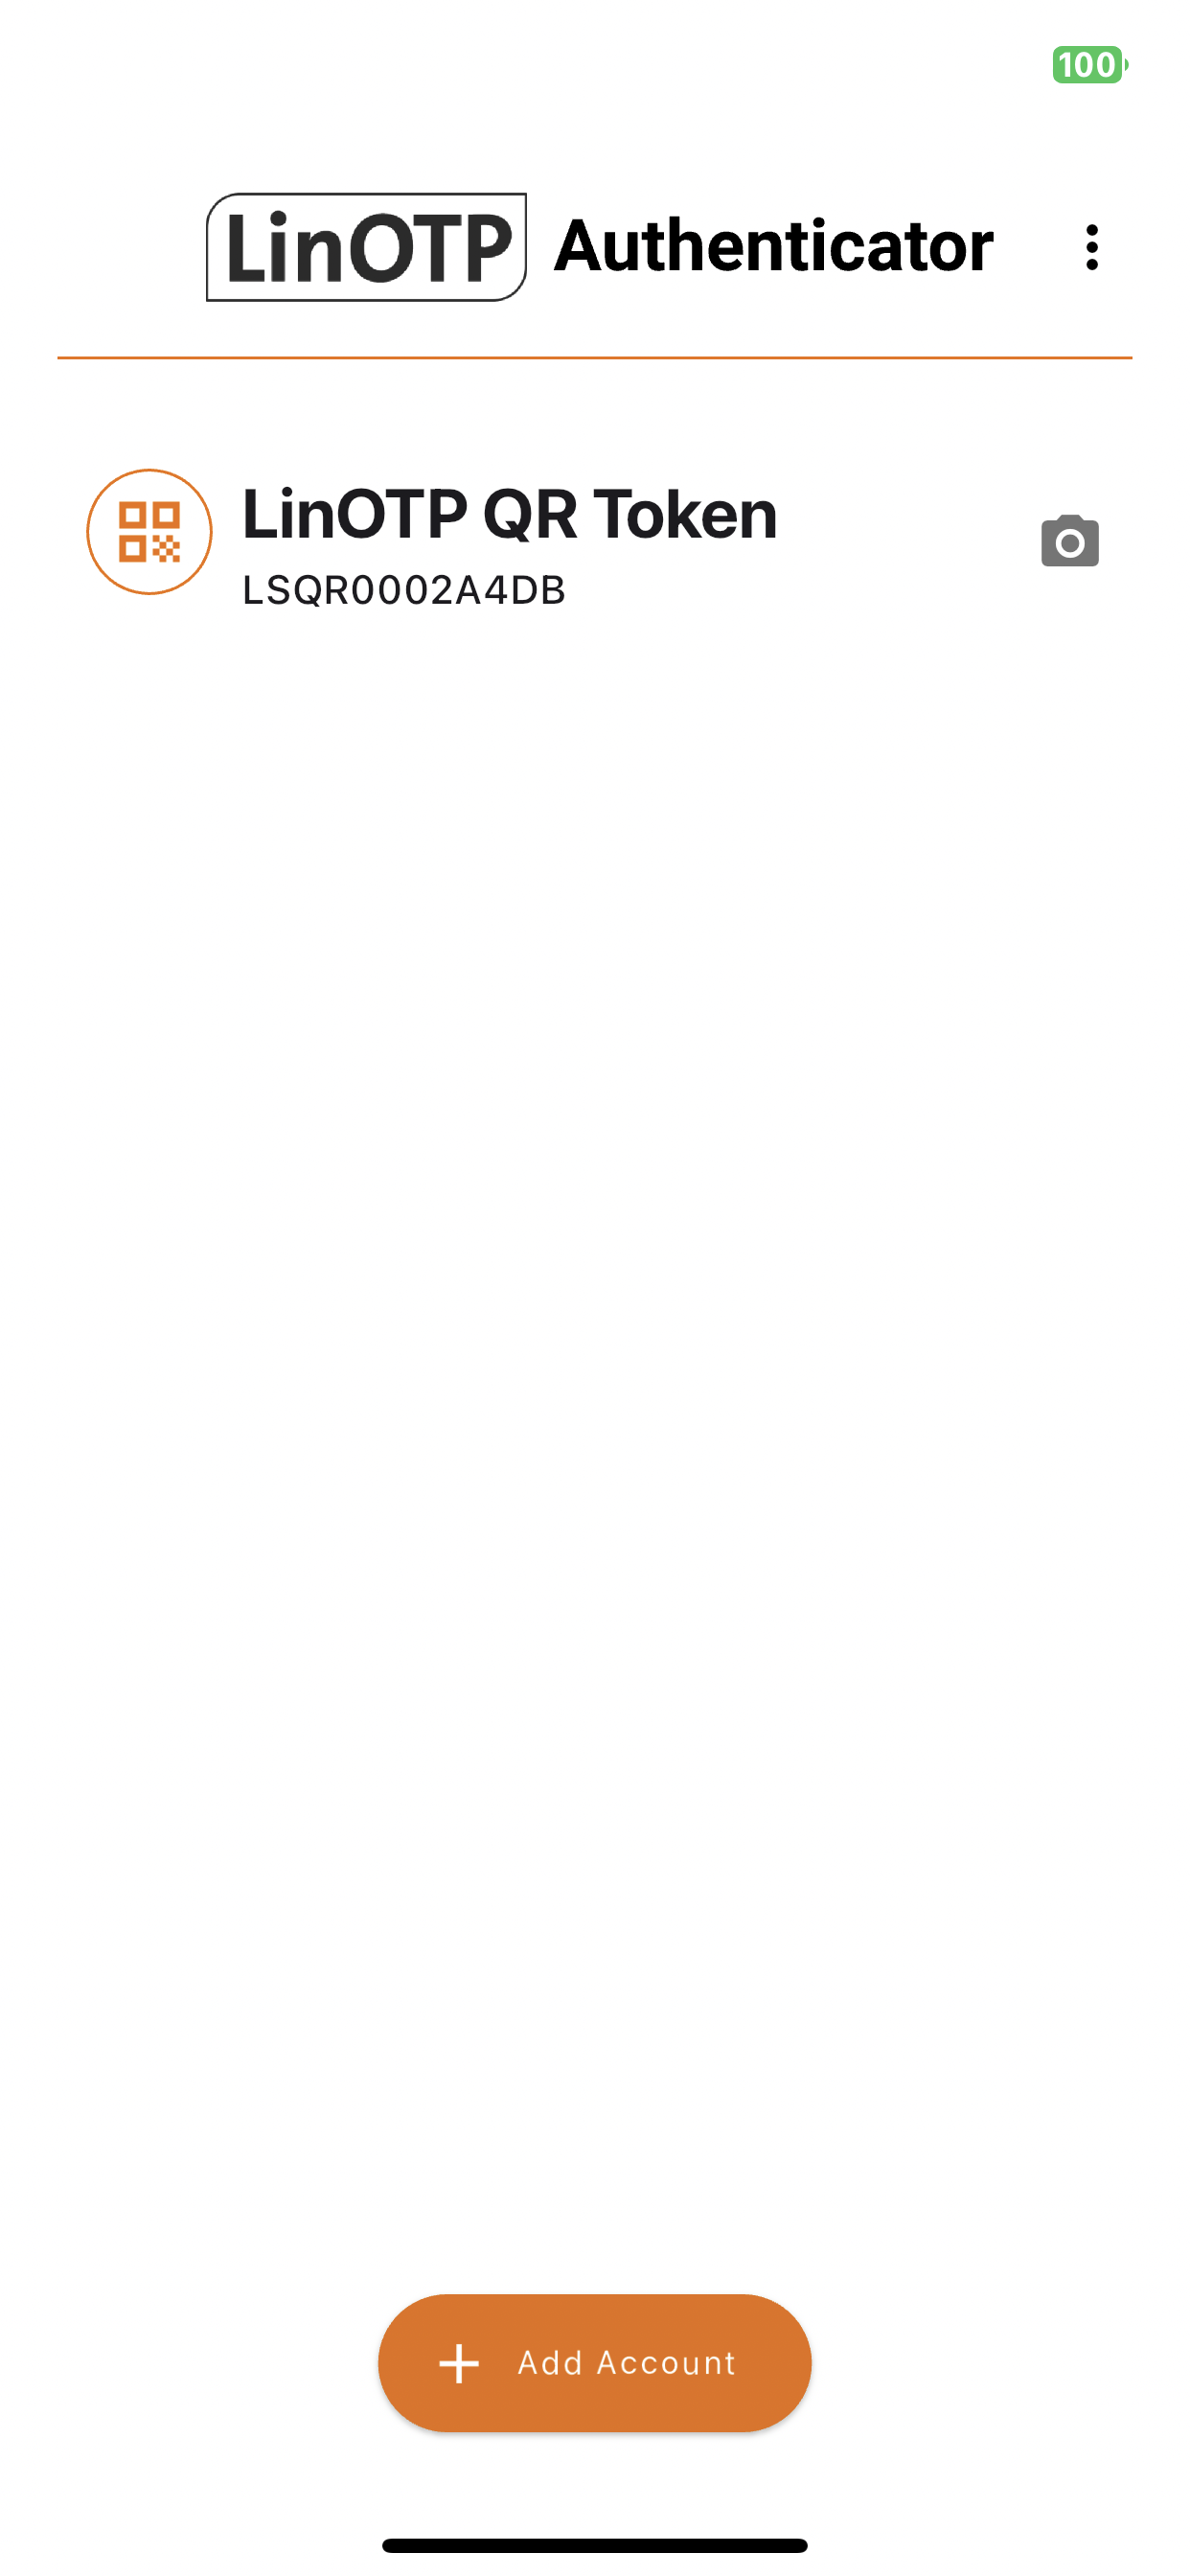
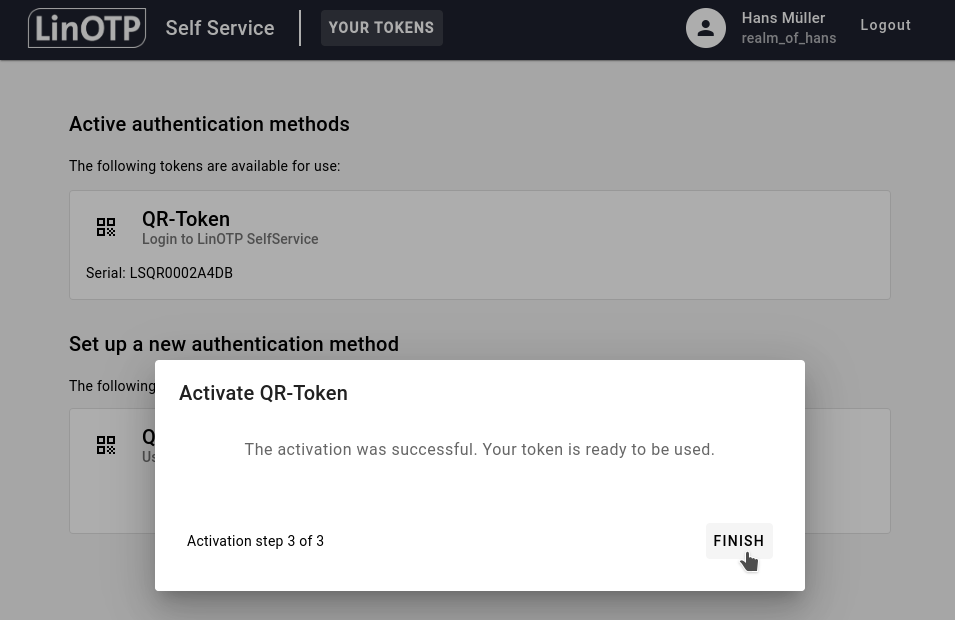
You will now see your activated QR token with an orange icon. You’ve completed the activation and your QR token is ready to use.
In the SelfService Portal you can now click on FINISH:
Test the LinOTP QR Token with /auth/qrtoken#
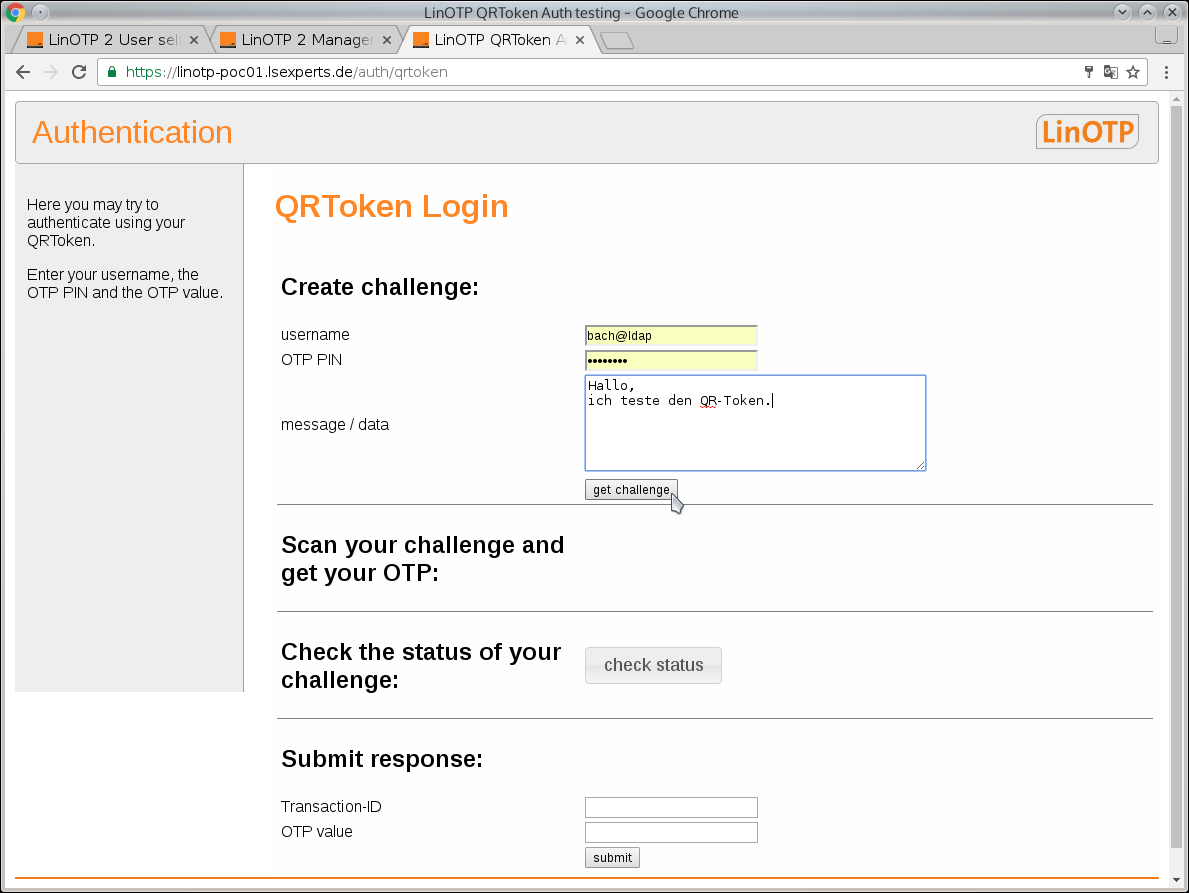
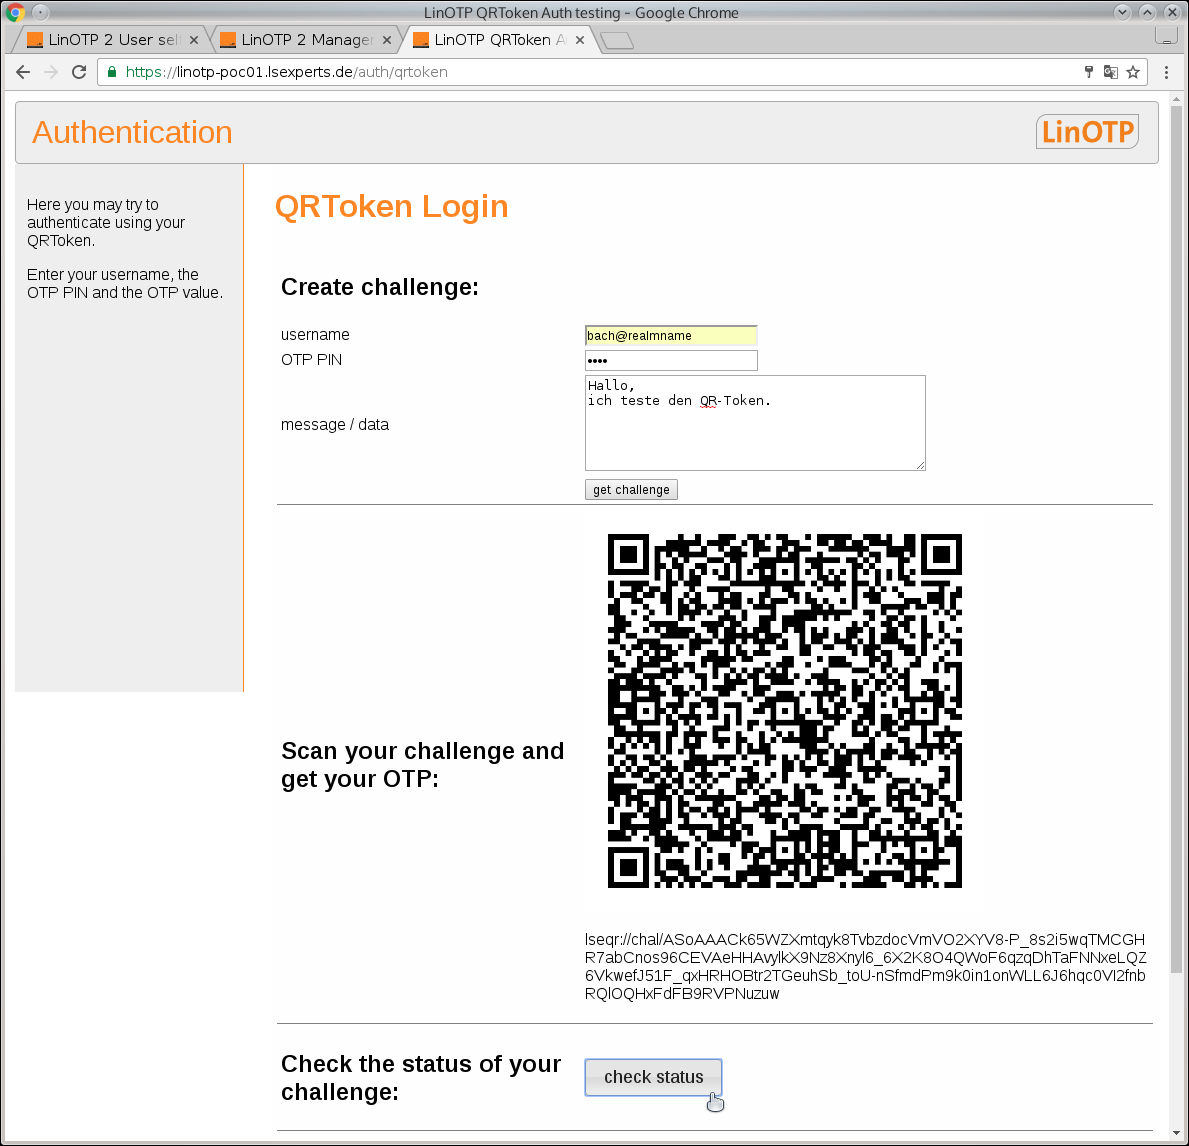
An active LinOTP QR token can be test at https://<linotp-srv.my.domain>/auth/qrtoken.
This portal allows the function test of its LinOTP QR Token.
Enter the necessary data under “Create challenge:”
- username:
Enter the same username as in the SelfService Portal
- OTP PIN:
The PIN that was given when the token was enrollment. Depending on the application, this is the PIN or the user password. This is the same value that is used for normal login.
- message /data:
A message that is displayed in the LinOTP Authenticator App. (Optional)
- get challenge
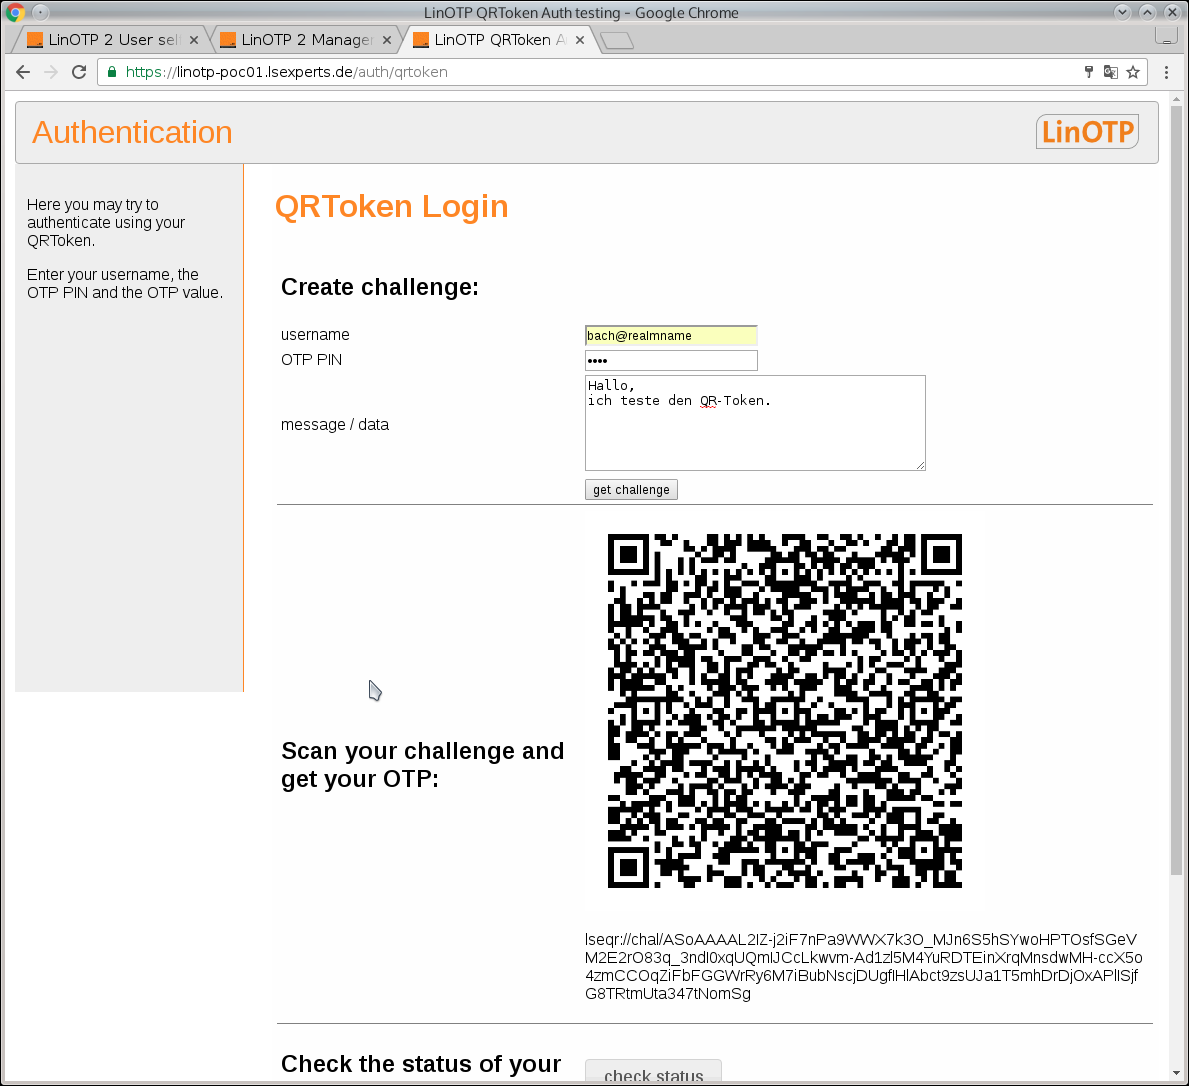
Initiates communication for authentication between LinOTP and the token in the LinOTP Authenticator App. You will receive a QR-Code, which is to be scanned with the LinOTP Authenticator App.
The QR code is scanned with the configured LinOTP Authenticator App. For every further step, the button “checkStatus” can be used to query the current status during ongoing authentication.
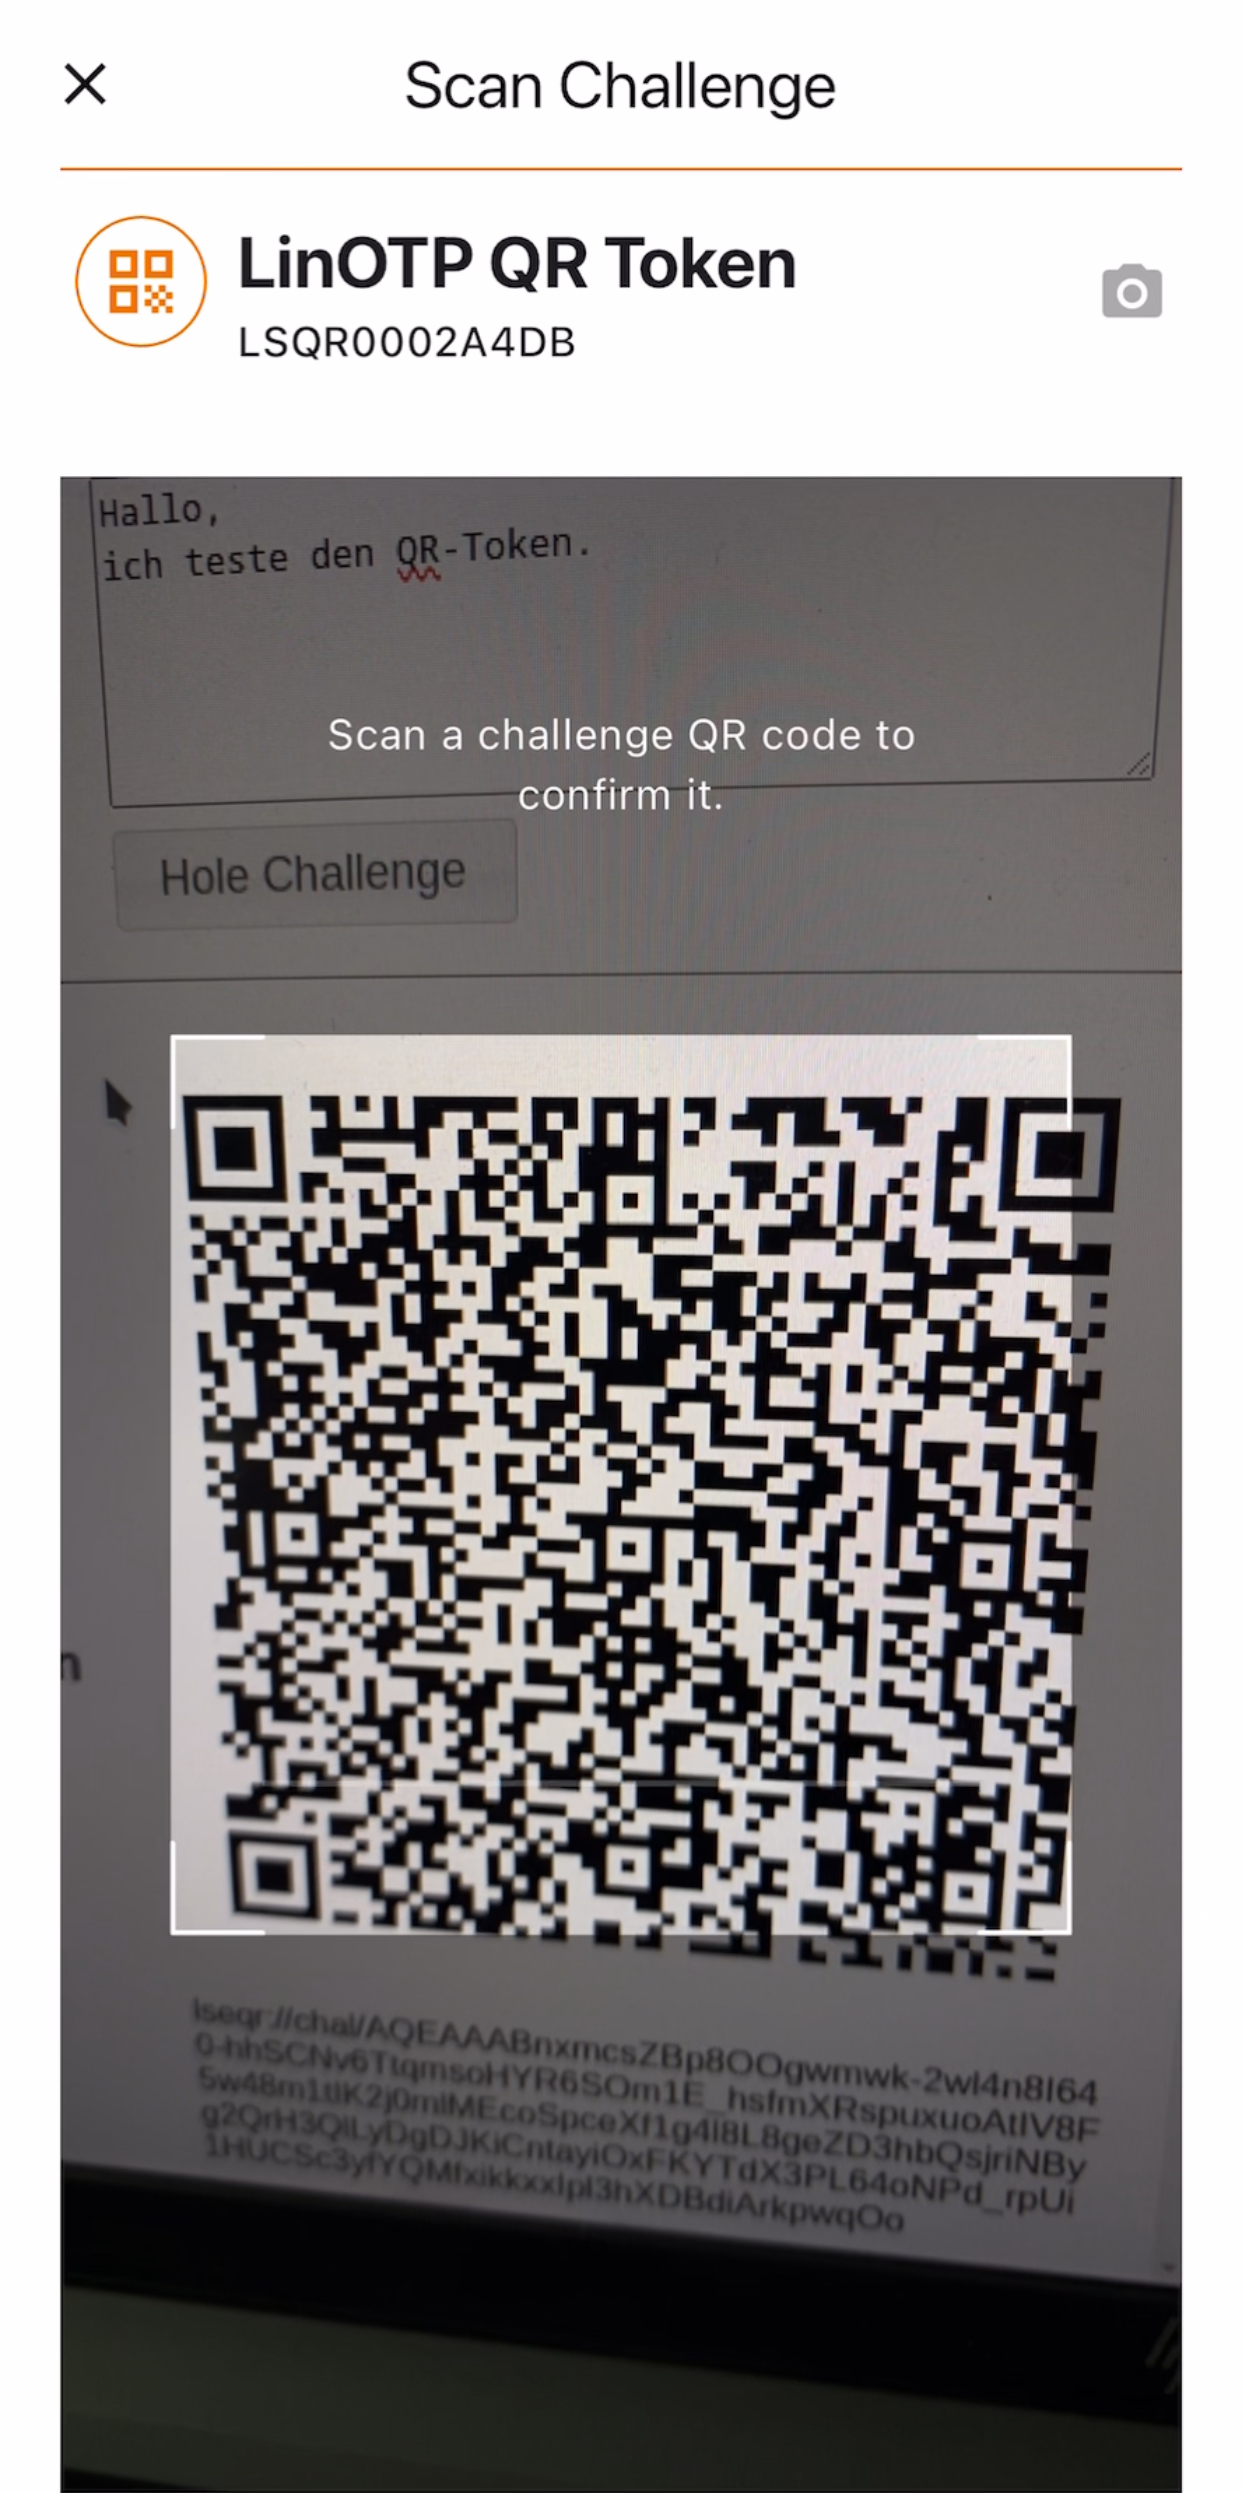
Head over to your smartphone, open LinOTP Authenticator, click on the QR token you just triggered the challenge for and scan the displayed QR-Code with LinOTP Authenticator.
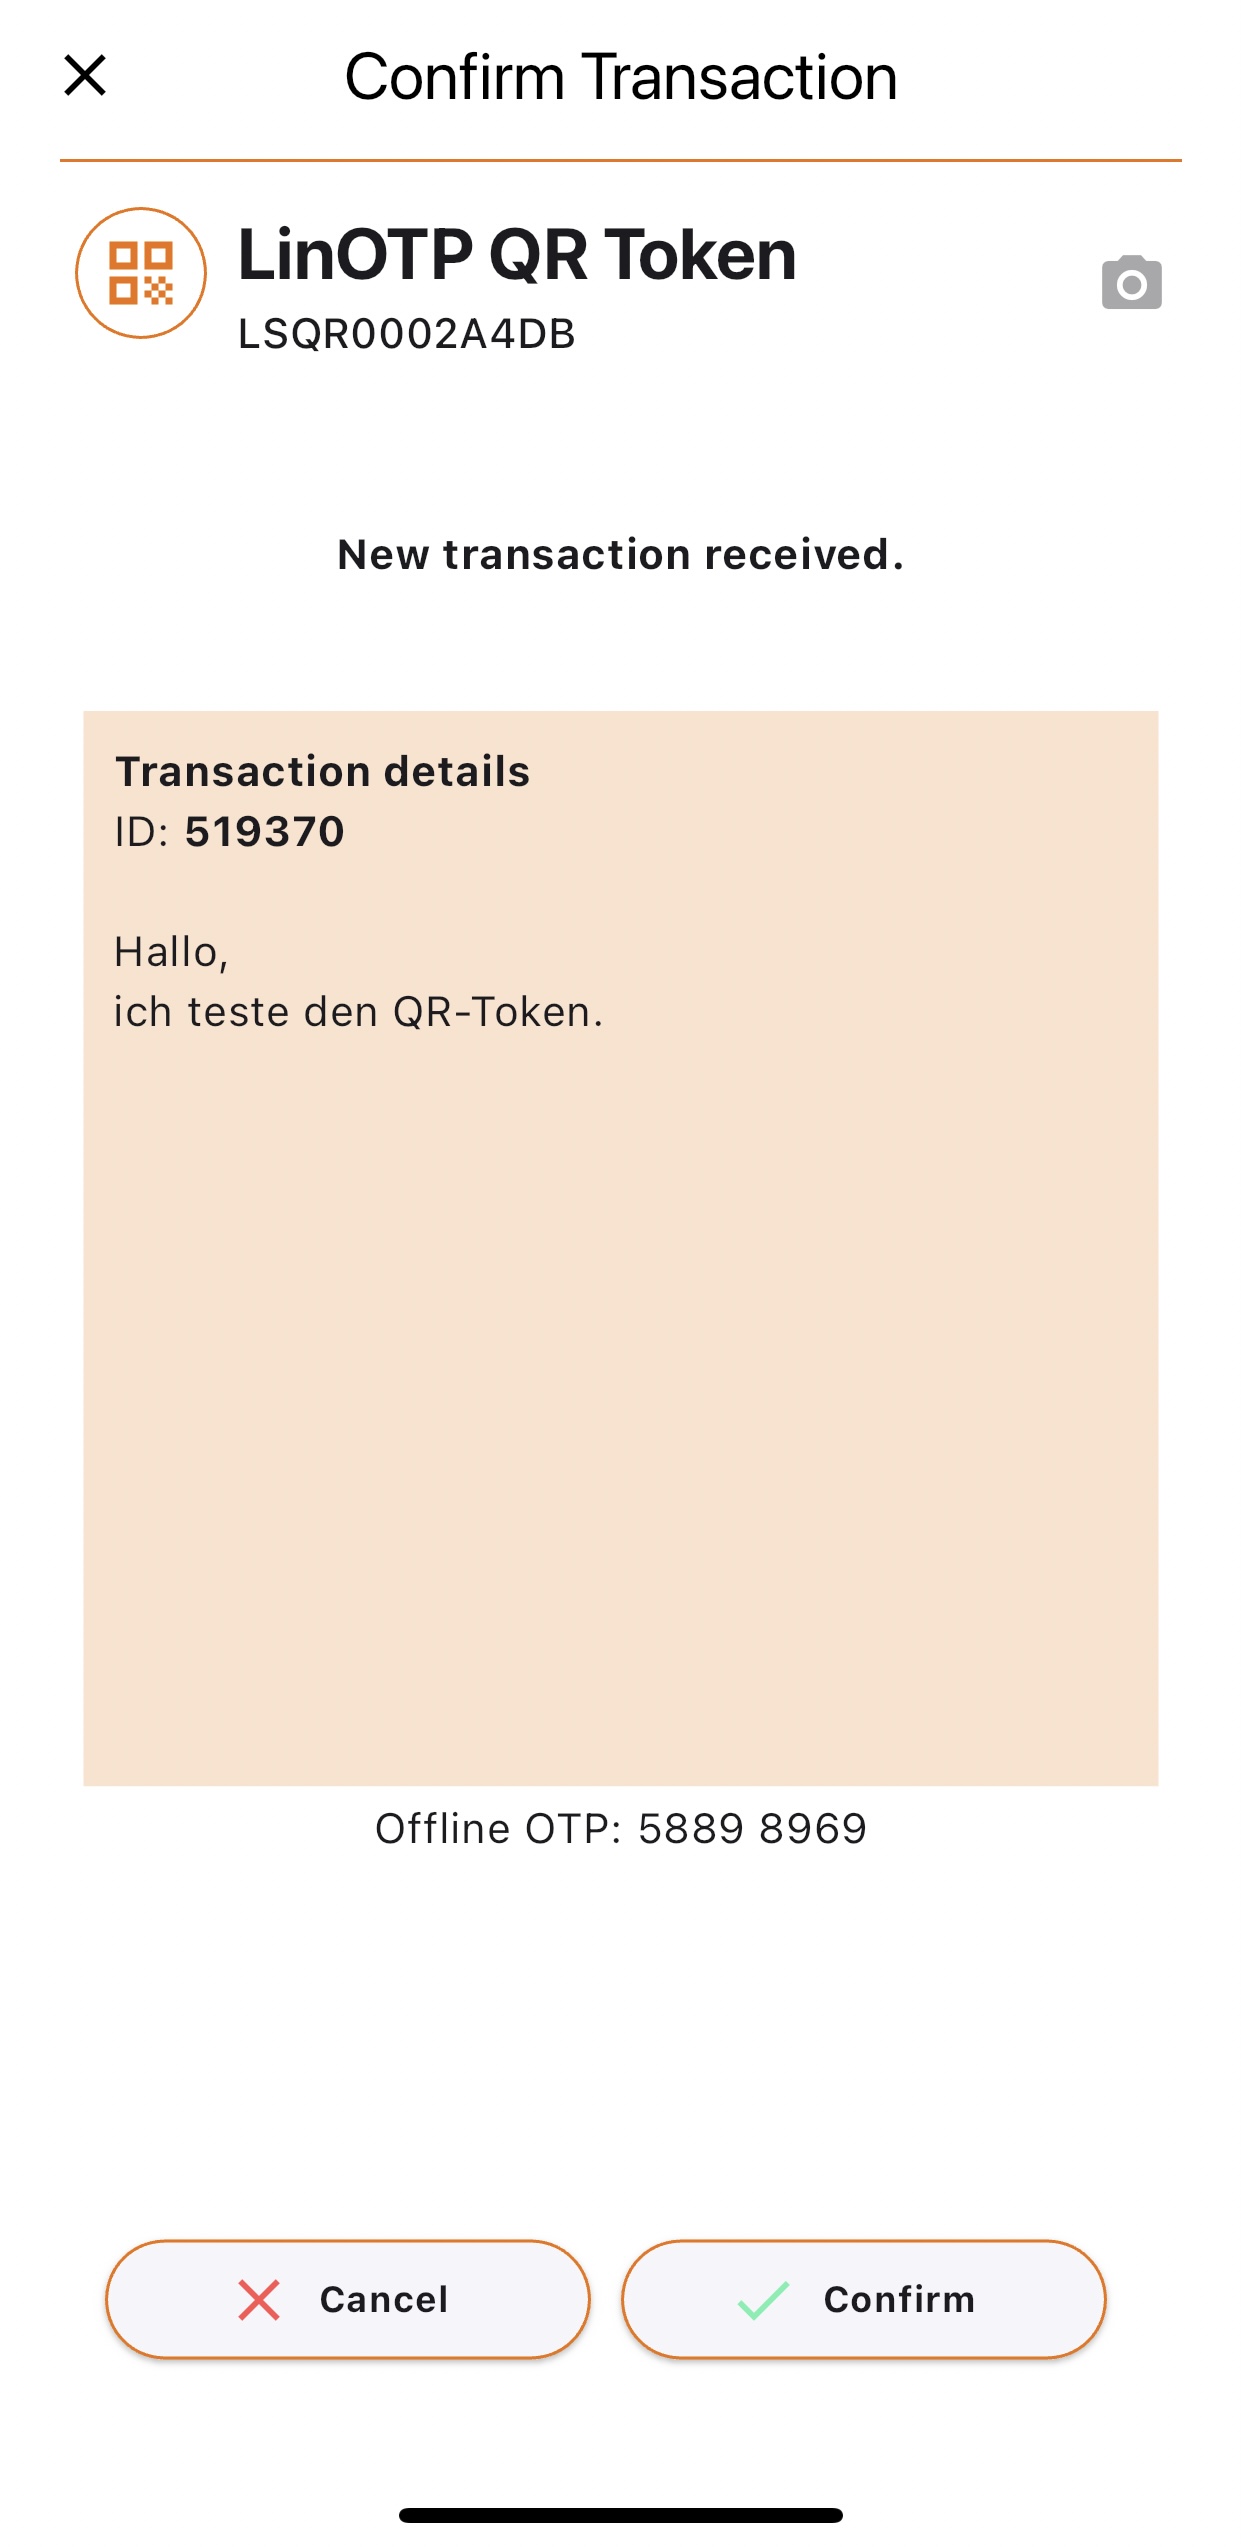
In the following dialog, the text from the message/data: field can be seen. The authentication process continues with the Confirm key.
Immediately before and after Confirm, the status display shows the state of the authentication.
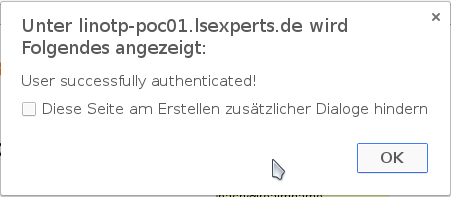
The indented window shows success: “User successfully authenticated!”
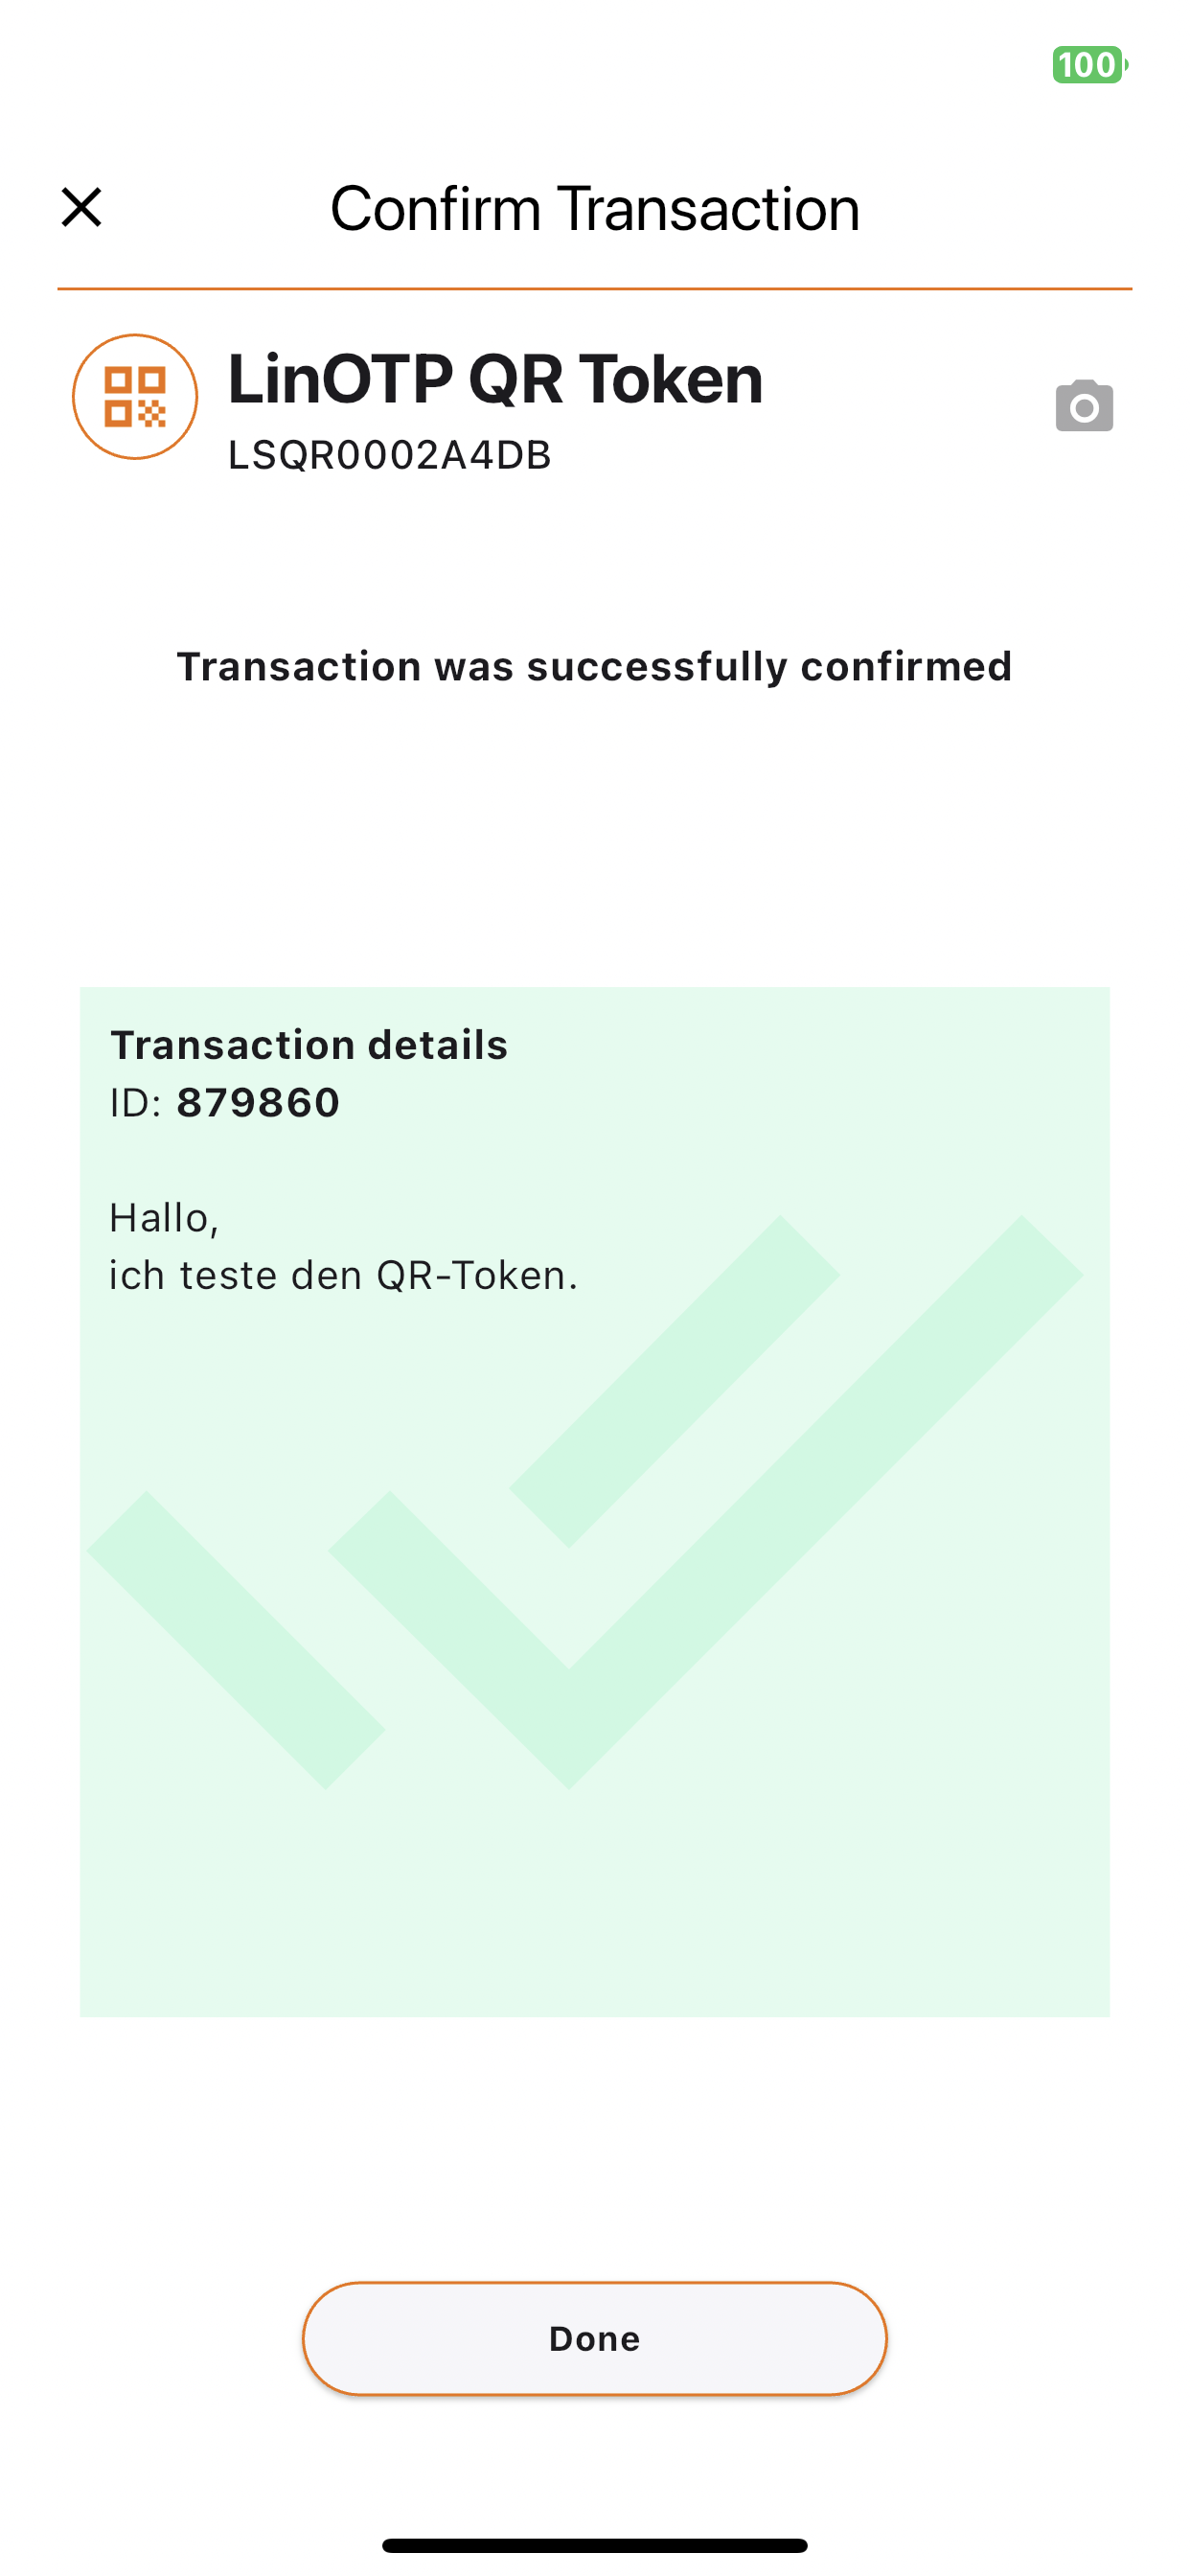
The LinOTP Authenticator app shows the successful completion in the following picture.
2.2.4. Enrolling OATH Token for Google Authenticator#
LinOTP also supports the Google Authenticator, that is available for Android phones and iPhones and the “OATH Token” for iPhones.
These tokens can be easily enrolled using the two dimensional QR code. Install the Google Authenticator or OATH Token via app store. In the SelfService Portal either choose “Enroll OATH Token” or “Enroll Google Authenticator”, click on enroll and use the camera of your phone to scan the QR code picture.
2.2.5. Using mOTP Token#
LinOTP provides a self service interface that can be used by the user to register a new mOTP 31 token completely on his own. mOTP is a one time password algorithm. For this algorithm many different applications to run on mobile phones, smart phones and iPhone and iPad are available. Your Administration or IT department should have provided you the download link from where to install the mOTP application to your smartphone. In this workflow the MobileOTP.jar Java MIDlet from https://motp.sourceforge.net is used.
Initializing the mOTP Token#
After installing the MIDlet to your phone, you need to initialize the application. Start the MobileOTP application.

The icon to start the application on your phone.#
The OTP token can be initialized by entering the PIN “0000”. This can be repeated at any time afterwards.
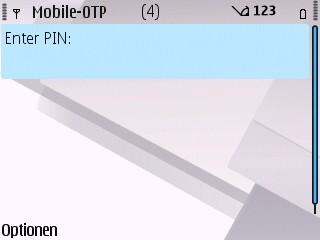
By entering the PIN ‘0000’ the token can be initialized any time.#
Now you need to put in 25 random numbers, that are used to create the init secret.
Now the init secret is displayed. You should not write this down and not show it to any other, since this is the very secret that is used to calculate the OTP values. This secret is only displayed once. As soon as you enter the PIN, the secret can not be displayed anymore.
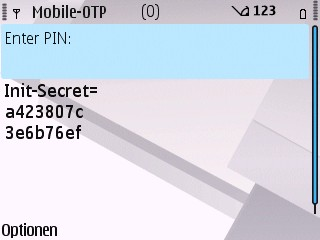
The init-secret is only displayed once.#
Registering the mOTP Token#
To create a new mOTP token, login to the SelfService Portal.
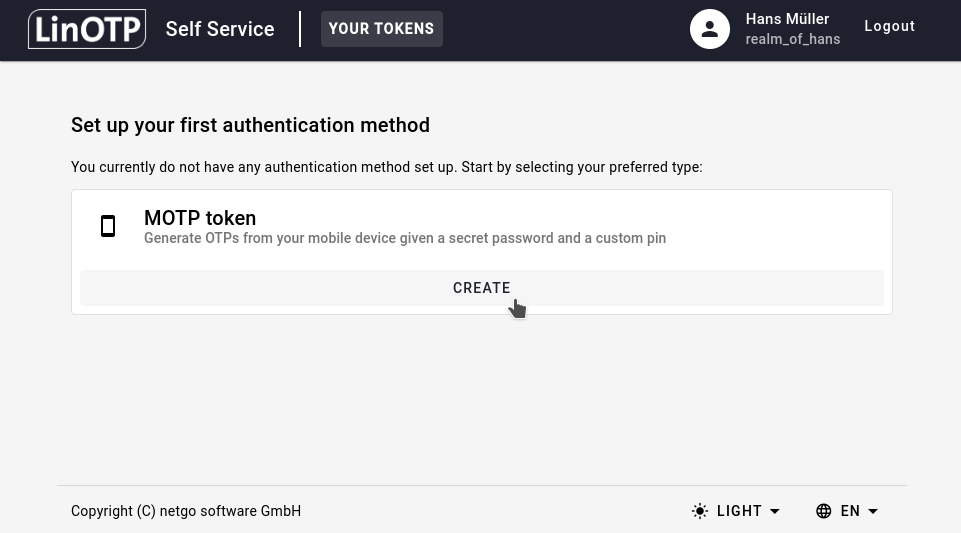
When successfully logged in, you are presented following screen. Click on CREATE to start the registration process.
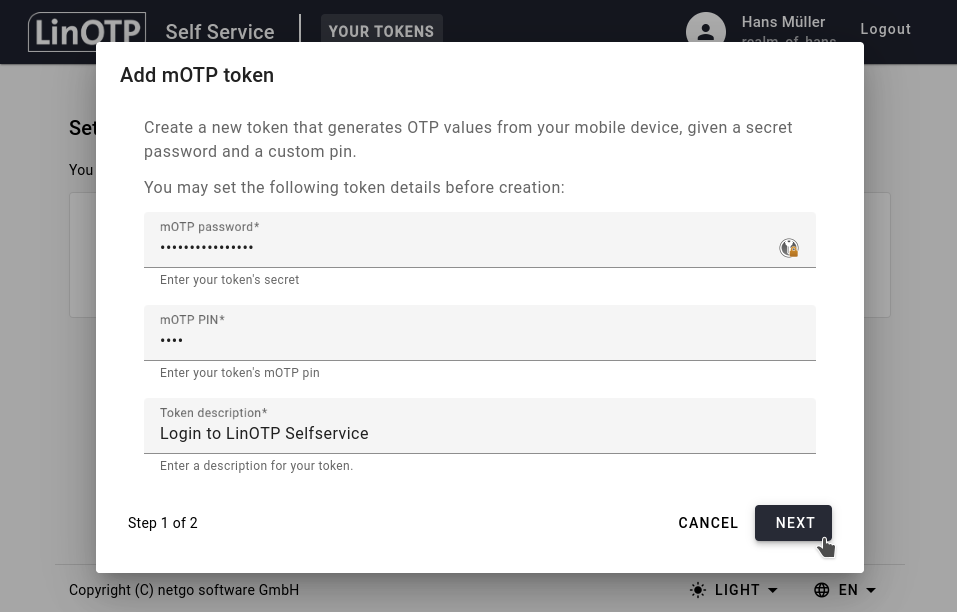
Here you need to enter the tokens secret that is displayed on your phone. Also enter an mOTP PIN, that you will enter into the MobileOTP application on your phone, each time you want to generate an OTP value. This mOTP PIN needs to be a 4 digit number.
Click NEXT to create your mOTP token.
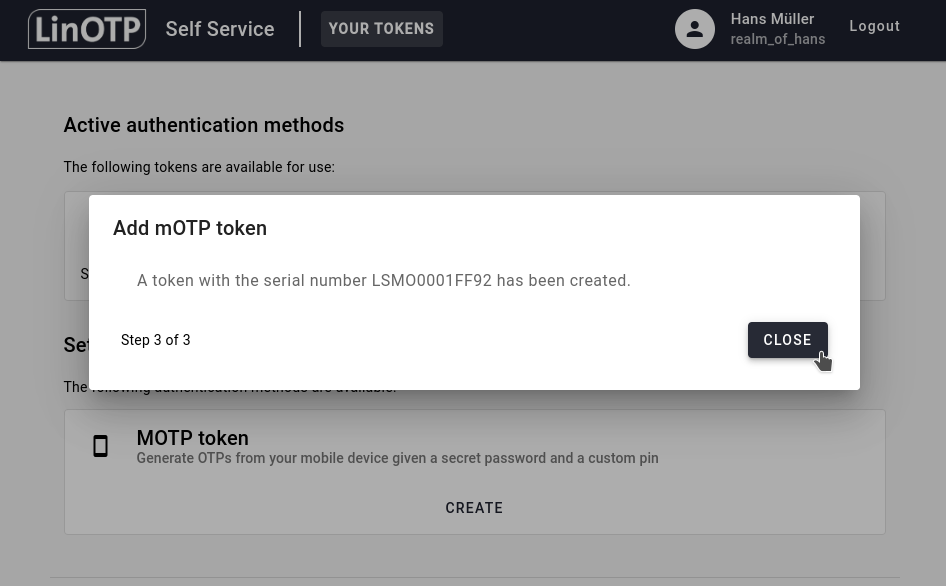
Here you see your mOTP tokens serial. Click CLOSE to see your new mOTP token in your token list:
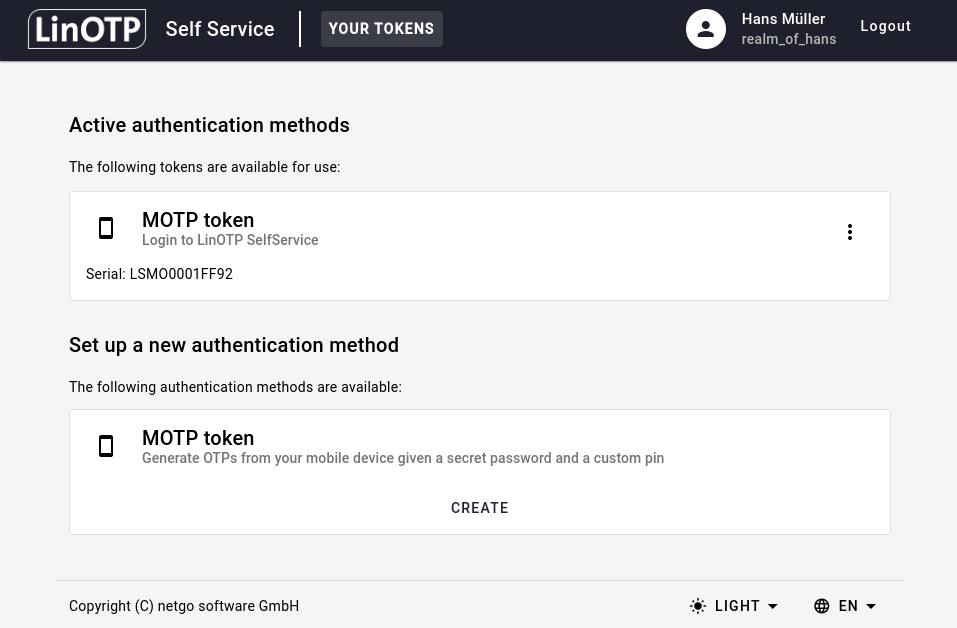
You may now set an additional OTP PIN via Change OTP PIN.
Authenticating using mOTP Token#
Probably you will use the mOTP Token to authenticate to a web site, a VPN connection or to a terminal server.
When doing so, you need to:
Enter your username into the login dialog username field
Enter your OTP PIN (the alpha numerical value) into the login dialog password field 3. Enter your mOTP PIN (the 4 digit number) into your MobileOTP application on your phone.
Your phone will display a one time password.
Now enter this one time password (0caa10) right behind the OTP PIN in the password field in the login dialog. 6. Press a button like “login”.
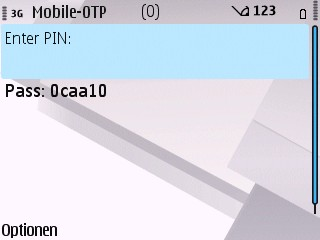
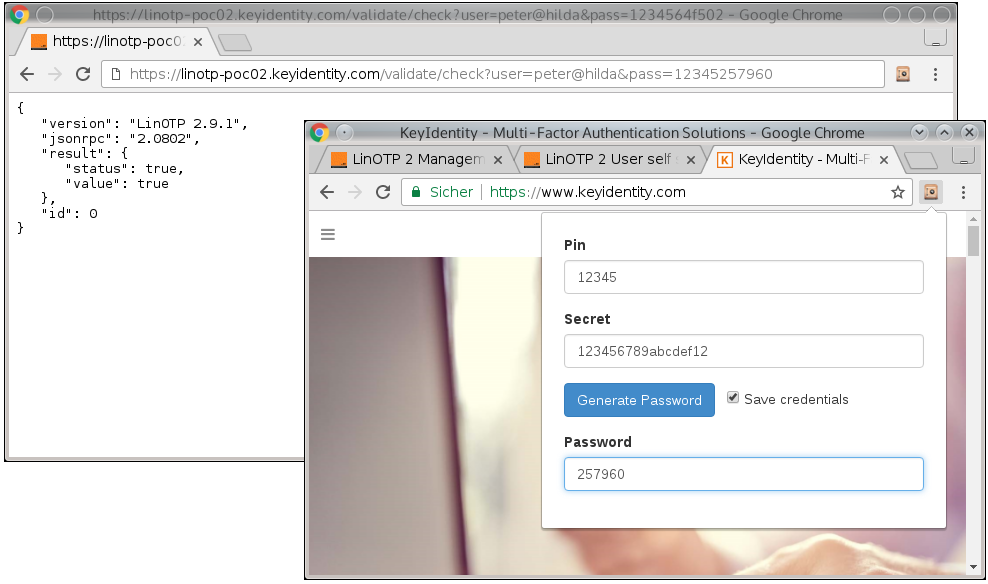
Generated One Time Password.#
2.2.6. Disable lost token#
If you lost your token or left it somewhere so that someone else might probably use your token, you should go to the SelfService Portal to disable your token.
Please note, that depending on LinOTPs policies, only an administrator can enable the token again!
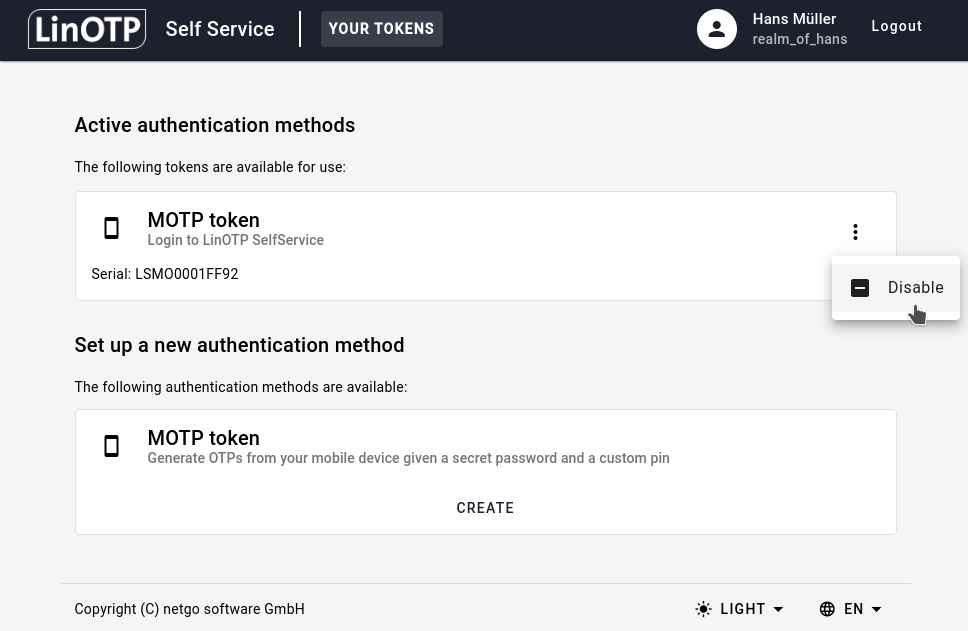
Choose the token you want to disable from the list of your tokens, click on the three-dots and then select Disable.
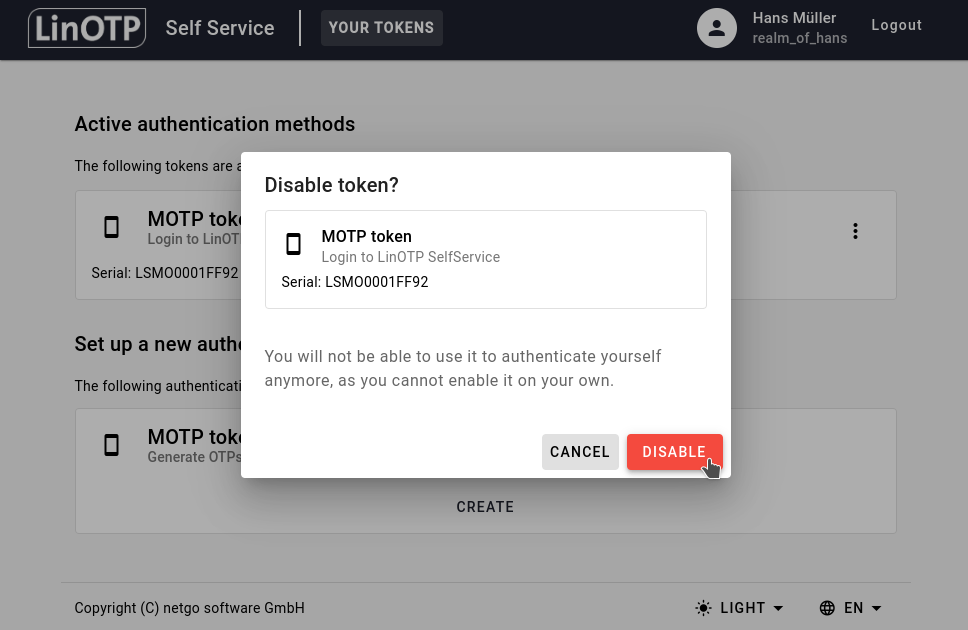
Click on DISABLE to disable your selected token. Logging in with this token will not be possible until it gets enabled again.
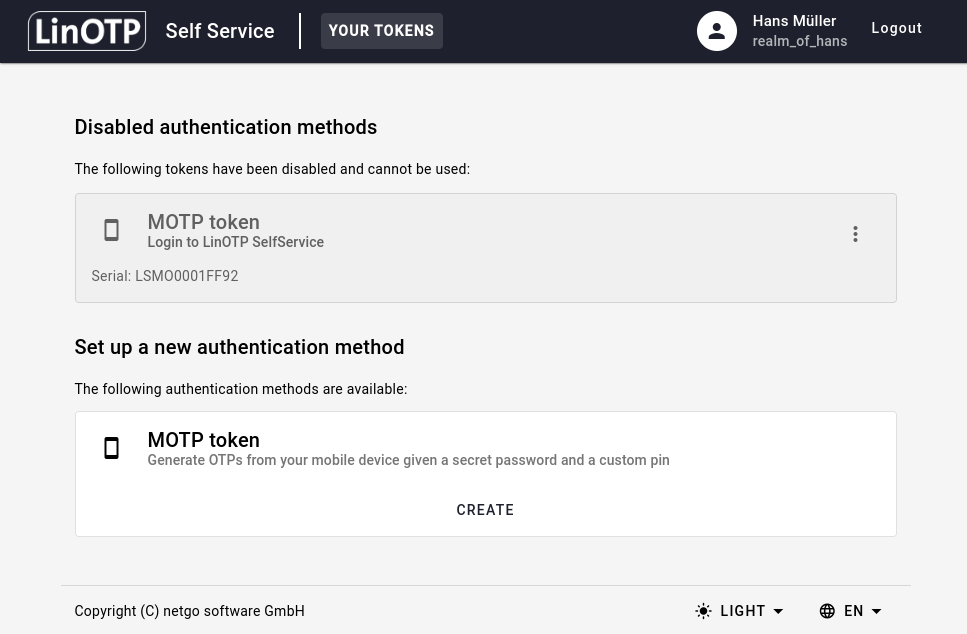
You will now see the disabled token greyed out as part of the section Disabled authentication methods:
2.2.7. Change OTP PIN#
This OTP PIN a fixed password, that is entered in front of the OTP value, each time you will authenticate. The OTP PIN can be an alpha numerical value.
If you forgot your OTP PIN or if you think, that someone spied on you and knows your OTP PIN, you can go to the SelfService Portal to reset your OTP PIN.
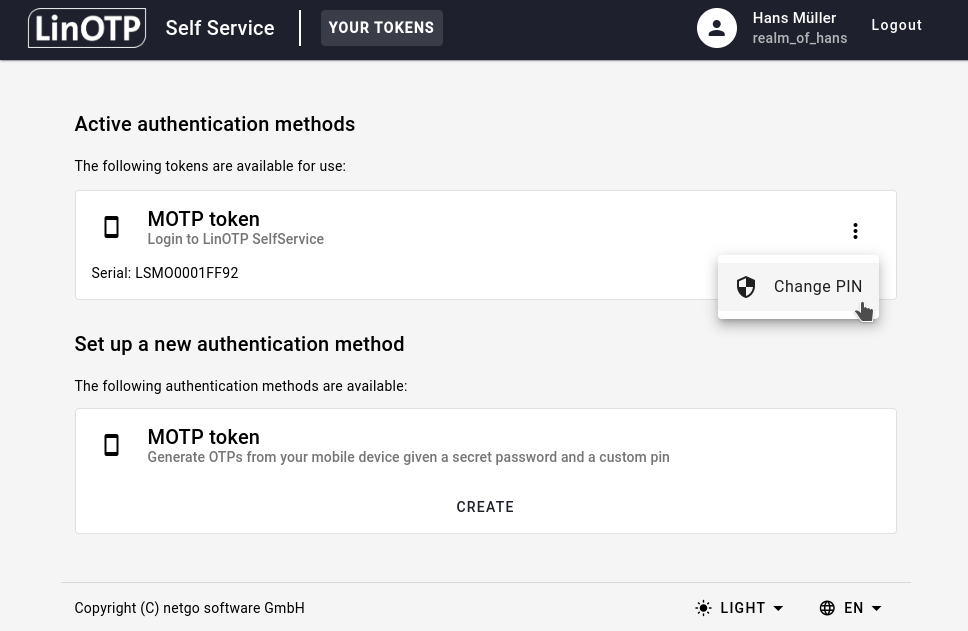
Choose the token you want to disable from the list of your tokens, click on the three-dots and then select Change PIN.
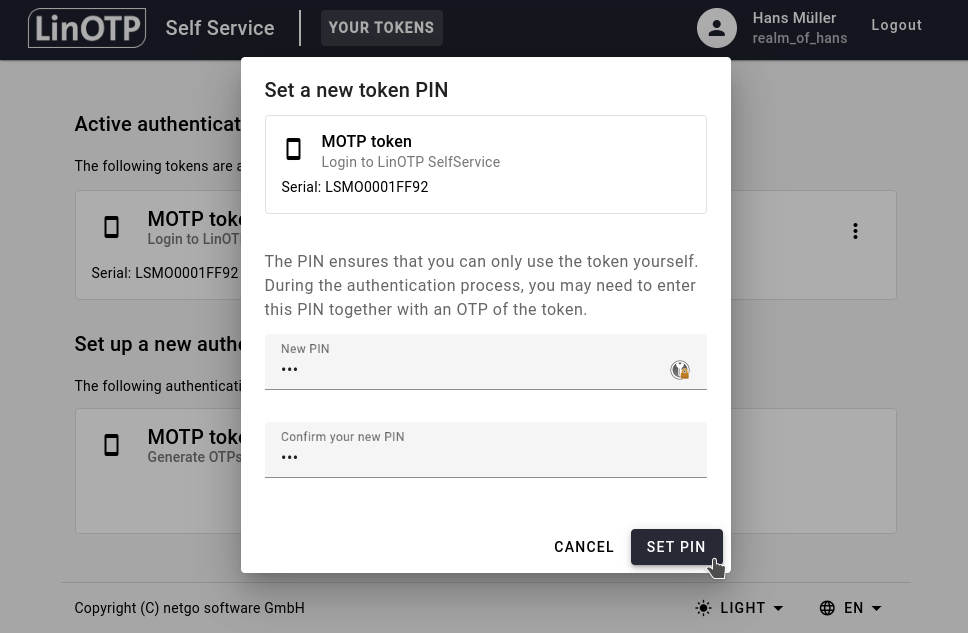
Enter a new OTP PIN two times and click on SET PIN.
2.2.8. Resynchronize Token#
Event based tokens might get out of sync, if the button on a token is pressed to often without having authenticated successfully. In this case you can go to the SelfService Portal to resynchronize your token.
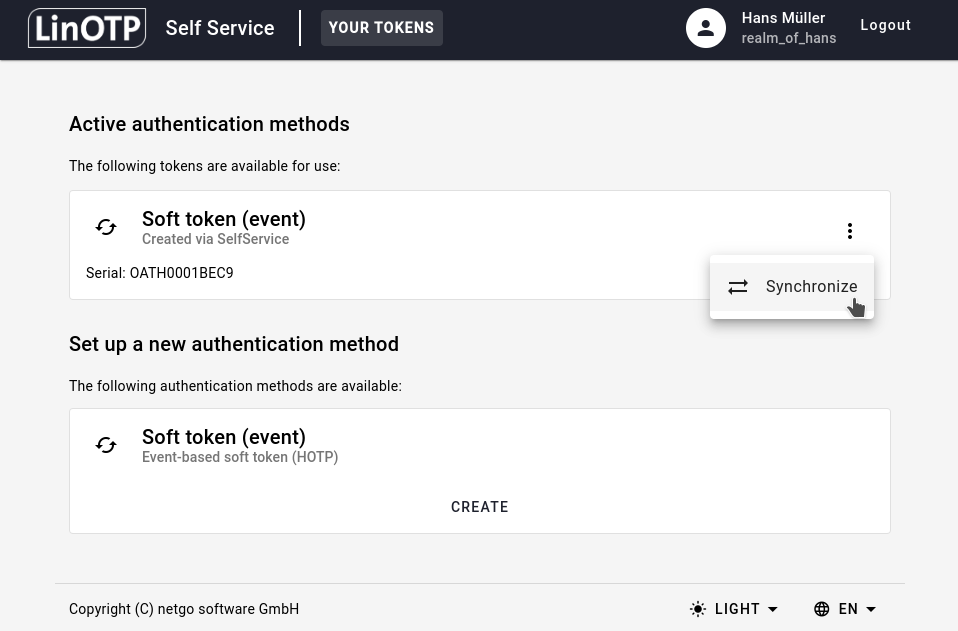
Choose the token you want to resynchronize from the list of your tokens, click on the three-dots and then select Synchronize.
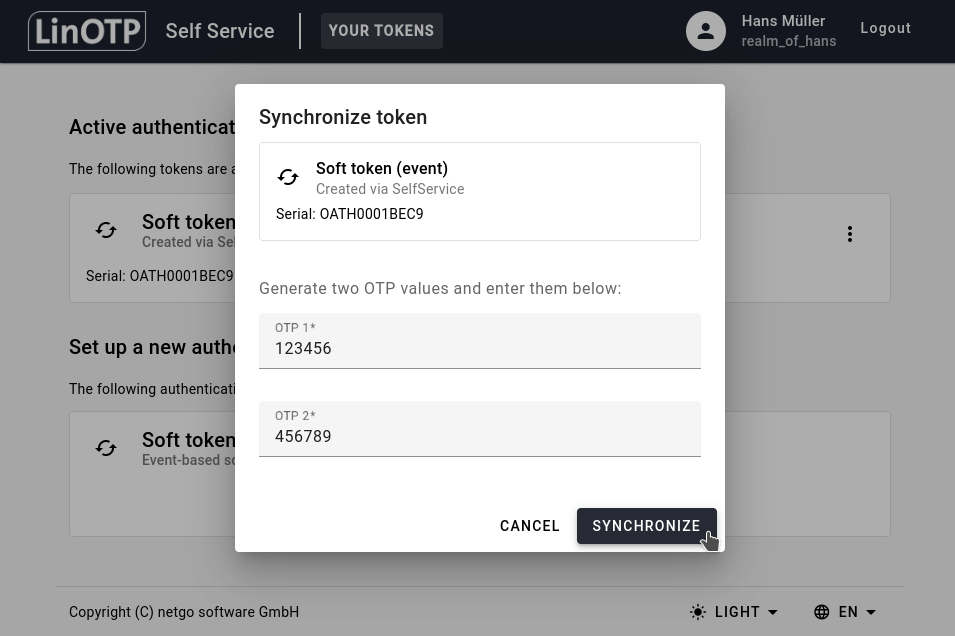
Now you need to generate two successive OTP values with your token. Enter the first 6 digit OTP value in the field “OTP 1” and the second 6 digit OTP value in the field “OTP 2” and click SYNCHRONIZE.
2.3. Individualize the SelfService Portal#
2.3.1. SelfService Portal Imprint#
You may define an imprint or contact information page for your self service portal. This can be different for each realm. Therefor you can create a different file and thus different information for each realm. The files have to be located at:
/etc/linotp2/imprint/<realm name>.imprint
This file may contain HTML code, so that you can add styles and links.
