15. Backup and restore
Backup and restore operations can be performed using the tabs System →
Backup and System → Restore in the Appliance dashboard
(https://<APPLIANCE>:8843). The backup can either be performed manually and
downloaded or automatically and stored on a SMB share on a regular base.
Note
We recommend to perform backups on a regular base. So in case the appliance (or LinOTP) becomes misconfigured you have a quite recent version for restorations. Such a backup comes also very handy if the whole appliance needs to be replaced. Have a look at chapter Disaster recovery for more detailed explanation on this procedure.
You can choose what you want to backup and what you want to restore. Each backup file is encrypted using AES-256 with an AES key derived from a passphrase you choose.
Warning
The backup contains security sensitiv data - so please use a secure passphrase.
A backup file may contain:
the appliance configuration files from /etc (this also contains the configuration sets)
the database encryption key
the SSL certificate
the database
The backup does not contain the log files. The log files can be downloaded
using the support file in System -> Support.
Remember to backup any files containing user information used by Flatfile UserIdResolvers. These are not included in the backup and must be backed up manually.
Tip
For security reasons we recommend to backup the database encryption key and the database separately. Normally the encryption key does not change so a one time manual backup should be enough.
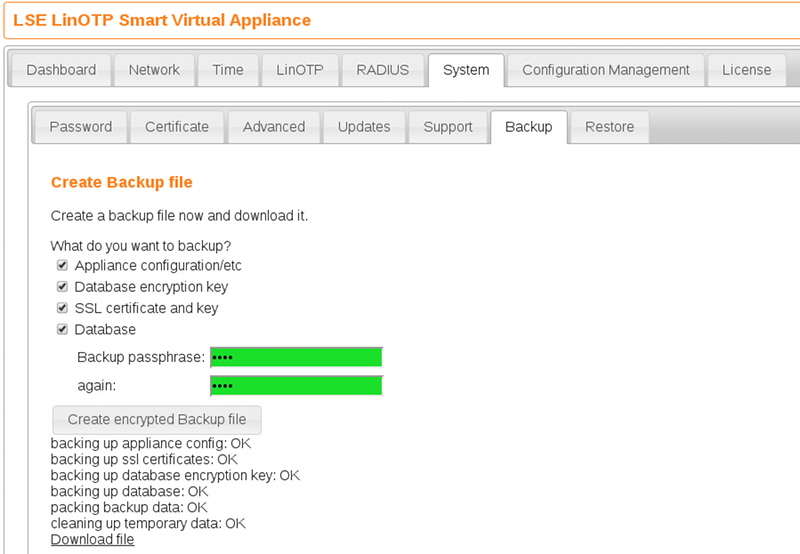
15.1. Manual Backup
Choose what should be included in the backup, enter a passphrase twice and select “Create encrypted Backup file”. After the backup was created it can be save to the local machine using the Link “Download file”.
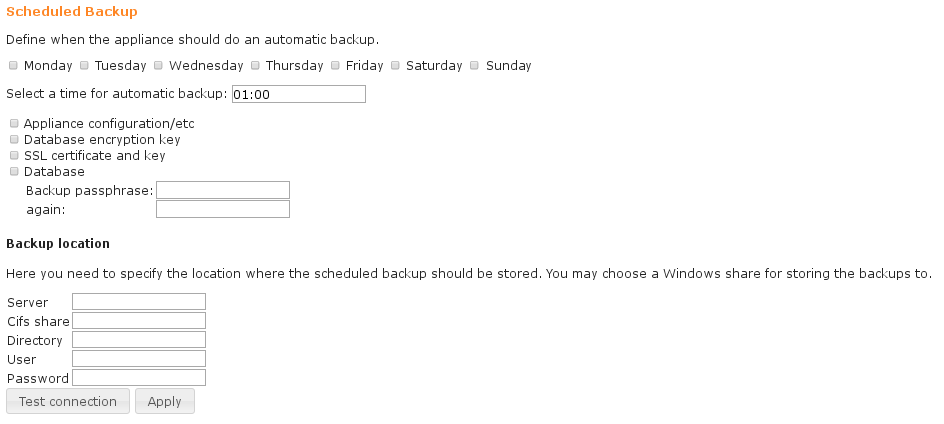
15.2. Automatic Backup
You may also perform scheduled automatic backups. Those backups are automatically stored to a Windows share on a file server.
A not yet configured form looks like this:
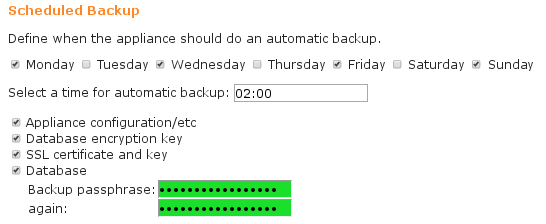
15.2.1. Details
Choose at which times the backup should be performed and select what the backup shall include:
Enter the required data of the remote backup location:
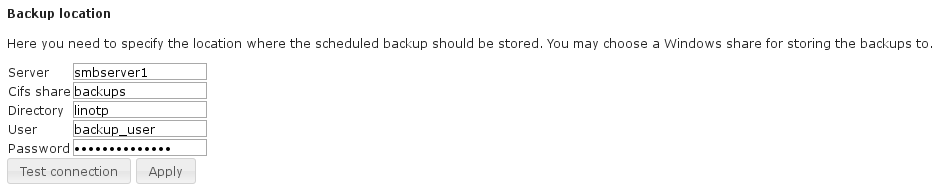
The configuration parameters are:
ServerFQDN or IP of the backup server.
Cifs shareName of the remote share.
DirectoryThe directory in the share where the backups should be stored (must exist).
UserName of the user to log in to the share.PasswordPassword to access the share.
The configuration can be checked with “Test Connection” and is activated with “Apply”.
Note
Please be aware: If the scheduled backup is already configured and parameters needs to be changed (e.g. the server name) the password field contains a dummy string for security reasons. So the actual password must be entered again before testing or applying the configuration.
Note
If the connection to the remote server fails although parameters are correct and firewall/network is configured appropriately the software/firmware of the SMB server (like NetApp) could be outdated.
15.3. Restore Settings and Data
In case of restore a backup file is uploaded, the encryption passphrase is passed and the appliance unpacks the backup file. It then determines the content of the backup file. In the example below the backup file contains everything except the database. Now you can choose which of the contained components you want to restore.
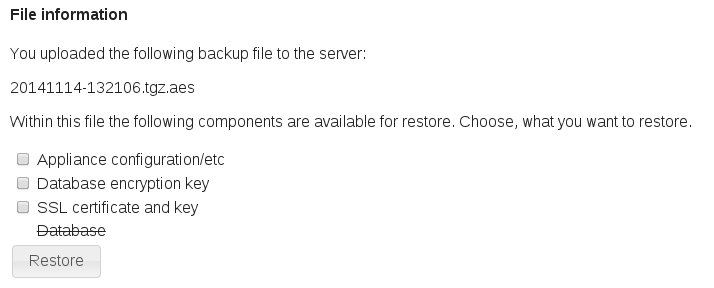
Restore a backup file without the database.
Warning
If the restore of the “Appliance configuration /etc/” is choosen the IP address of the Appliance will be set to the one from the backup. This can cause trouble if the network configuration was changed since the last backup or if the backup was generated on a different Appliance.
Warning
If a backup from Appliance Version 1.x is applied to Appliance version 2.x only the database and the encryption key may be restored due to the different versions of operating systems of the Appliances. The only reliable way to restore a 1.x backup completely to a 2.x Appliance is during the installation using the wizard.